CRM
CRM is used to manage custom collections of data.
In the CLI
The ServisBOT CLI supports a number of operations regarding CRM collections. These are:
sb-cli crm create- Creates a new CRM collection from JSON or an inline file.sb-cli crm list- Lists the existing CRM collections in the organization.sb-cli crm delete- Deletes a CRM collection by its name.
A collection can be created with the following JSON:
{
  "name": "student",
  "itemIdentifierField": "studentId",
  "description": "A collection of students in the system"
}- Name (required) - A unique name for the collection.
- ItemIdentifierField (required) - The field that uniquely identifies an item in the collection.
- Description (required) - A description of the collection.
For more info on these commands, run sb-cli crm --help or sb-cli crm <command> --help while logged into your organization.
Uploading a collection
Uploading a collection is done though SFTP.
Setting up SFTP
Contact ServisBOT to set up SFTP for your organization. You will be asked to provide:
- A username for the SFTP account
- A password for the SFTP account
- An IP address to whitelist for the SFTP account
- This will be the IP address of the machine you will be uploading from
Uploading data to a collection
Once you have SFTP for your organization you can upload data to a collection. To do this, you will need to:
1. Create a CSV file with the data you want to upload.
Ensure that the CSV contains a column with the name of the ItemIdentifierField for the collection. This is used to reference the item in the collection.
studentId,history,math,science
1,A,A,A
2,B,C,A
3,F,F,F
4,D,D,D
5,C,C,A
2. Upload the CSV file to the SFTP server.
Login, the domain name is dependent on your organizations region. Currently only US is supported.
sftp sftpUser@courier.us1.servisbot.com
# Enter password when prompted
Upload a file, the file should be uploaded into a directory with the same name as the collections. In this case, the collection is called student, so the file should be uploaded to student/<fileName>.csv.
put student.csv student/student.csvAfter this is done the data will be available in flow.
Warning
The collection data will be replaced with the data from the CSV file.
CRM Node
CRM can be used in flows with the CRM node - by supplying a CRM collection name and an item ID, the item is retrieved and stored in msg.crm.yourNodeName.
- The node outputs through the top port if the collection item is found.
- The node outputs through the middle port if the collection item is not found.
- The node outputs through the bottom port if there is an error.
The collection name can either be picked from a list of existing collections, or retrieved from the msg object.
The collection item ID can be hardcoded as a string, or pulled from the msg object.
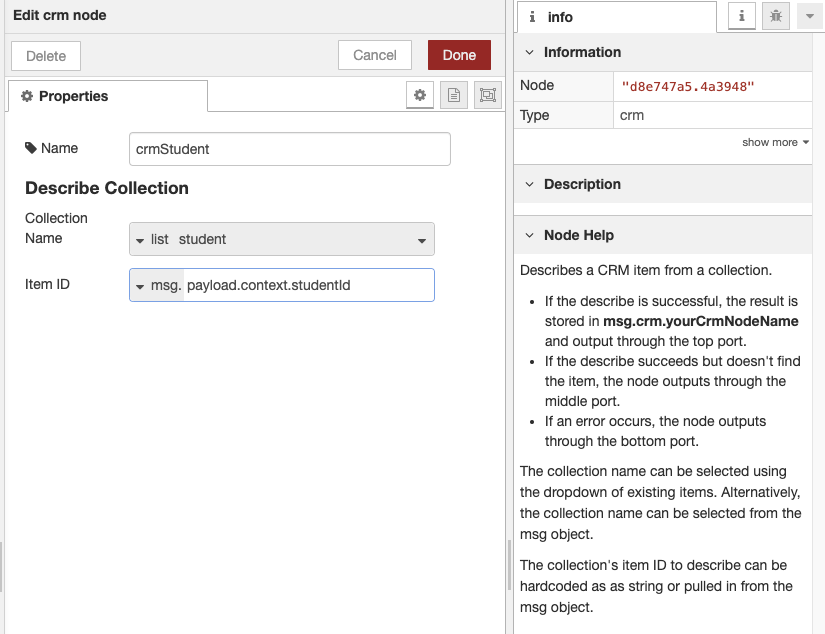
In our example the CRM node is used to retrieve a student from the student collection, if found, the data can be retrieved from msg.crm.student. This will return an object containing the data uploaded in the CSV.
Sample markup for an interaction node:
<TimelineMessage>
  <TextMsg>
    Student ${crm.student.studentId} Grades:
    History: ${crm.student.history}
    Math: ${crm.student.math}
    Science: ${crm.student.science}
  </TextMsg>
</TimelineMessage>