Single Sign On (SSO)
SevisBOT supports Single Sign On (SSO) when accessing Portal through OpenID Connect (OIDC). This document outlines the process of configuring SSO for your organization.
Since every identity provider is different, these steps and the terminology may vary slightly, please contact ServisBOT if further assistance is required.
Step 1: Provide Secrets and Configuration to ServisBOT
- Create a new Application within your Identity Provider
- Ensure it is OpenID Connect compatible
ServisBOT requires the following information from this application:
- Client ID
- Client Secret
- Identity Provider Domain e.g.
https://servisbot.okta.com
Step 2: Configure your Identity Provider
Upon receipt of the information above, ServisBOT will generate the Login Redirect URL and provide it to you. This should be entered into your application.
If you have not done so already, it may be required to add your new application to selected users within your organization.
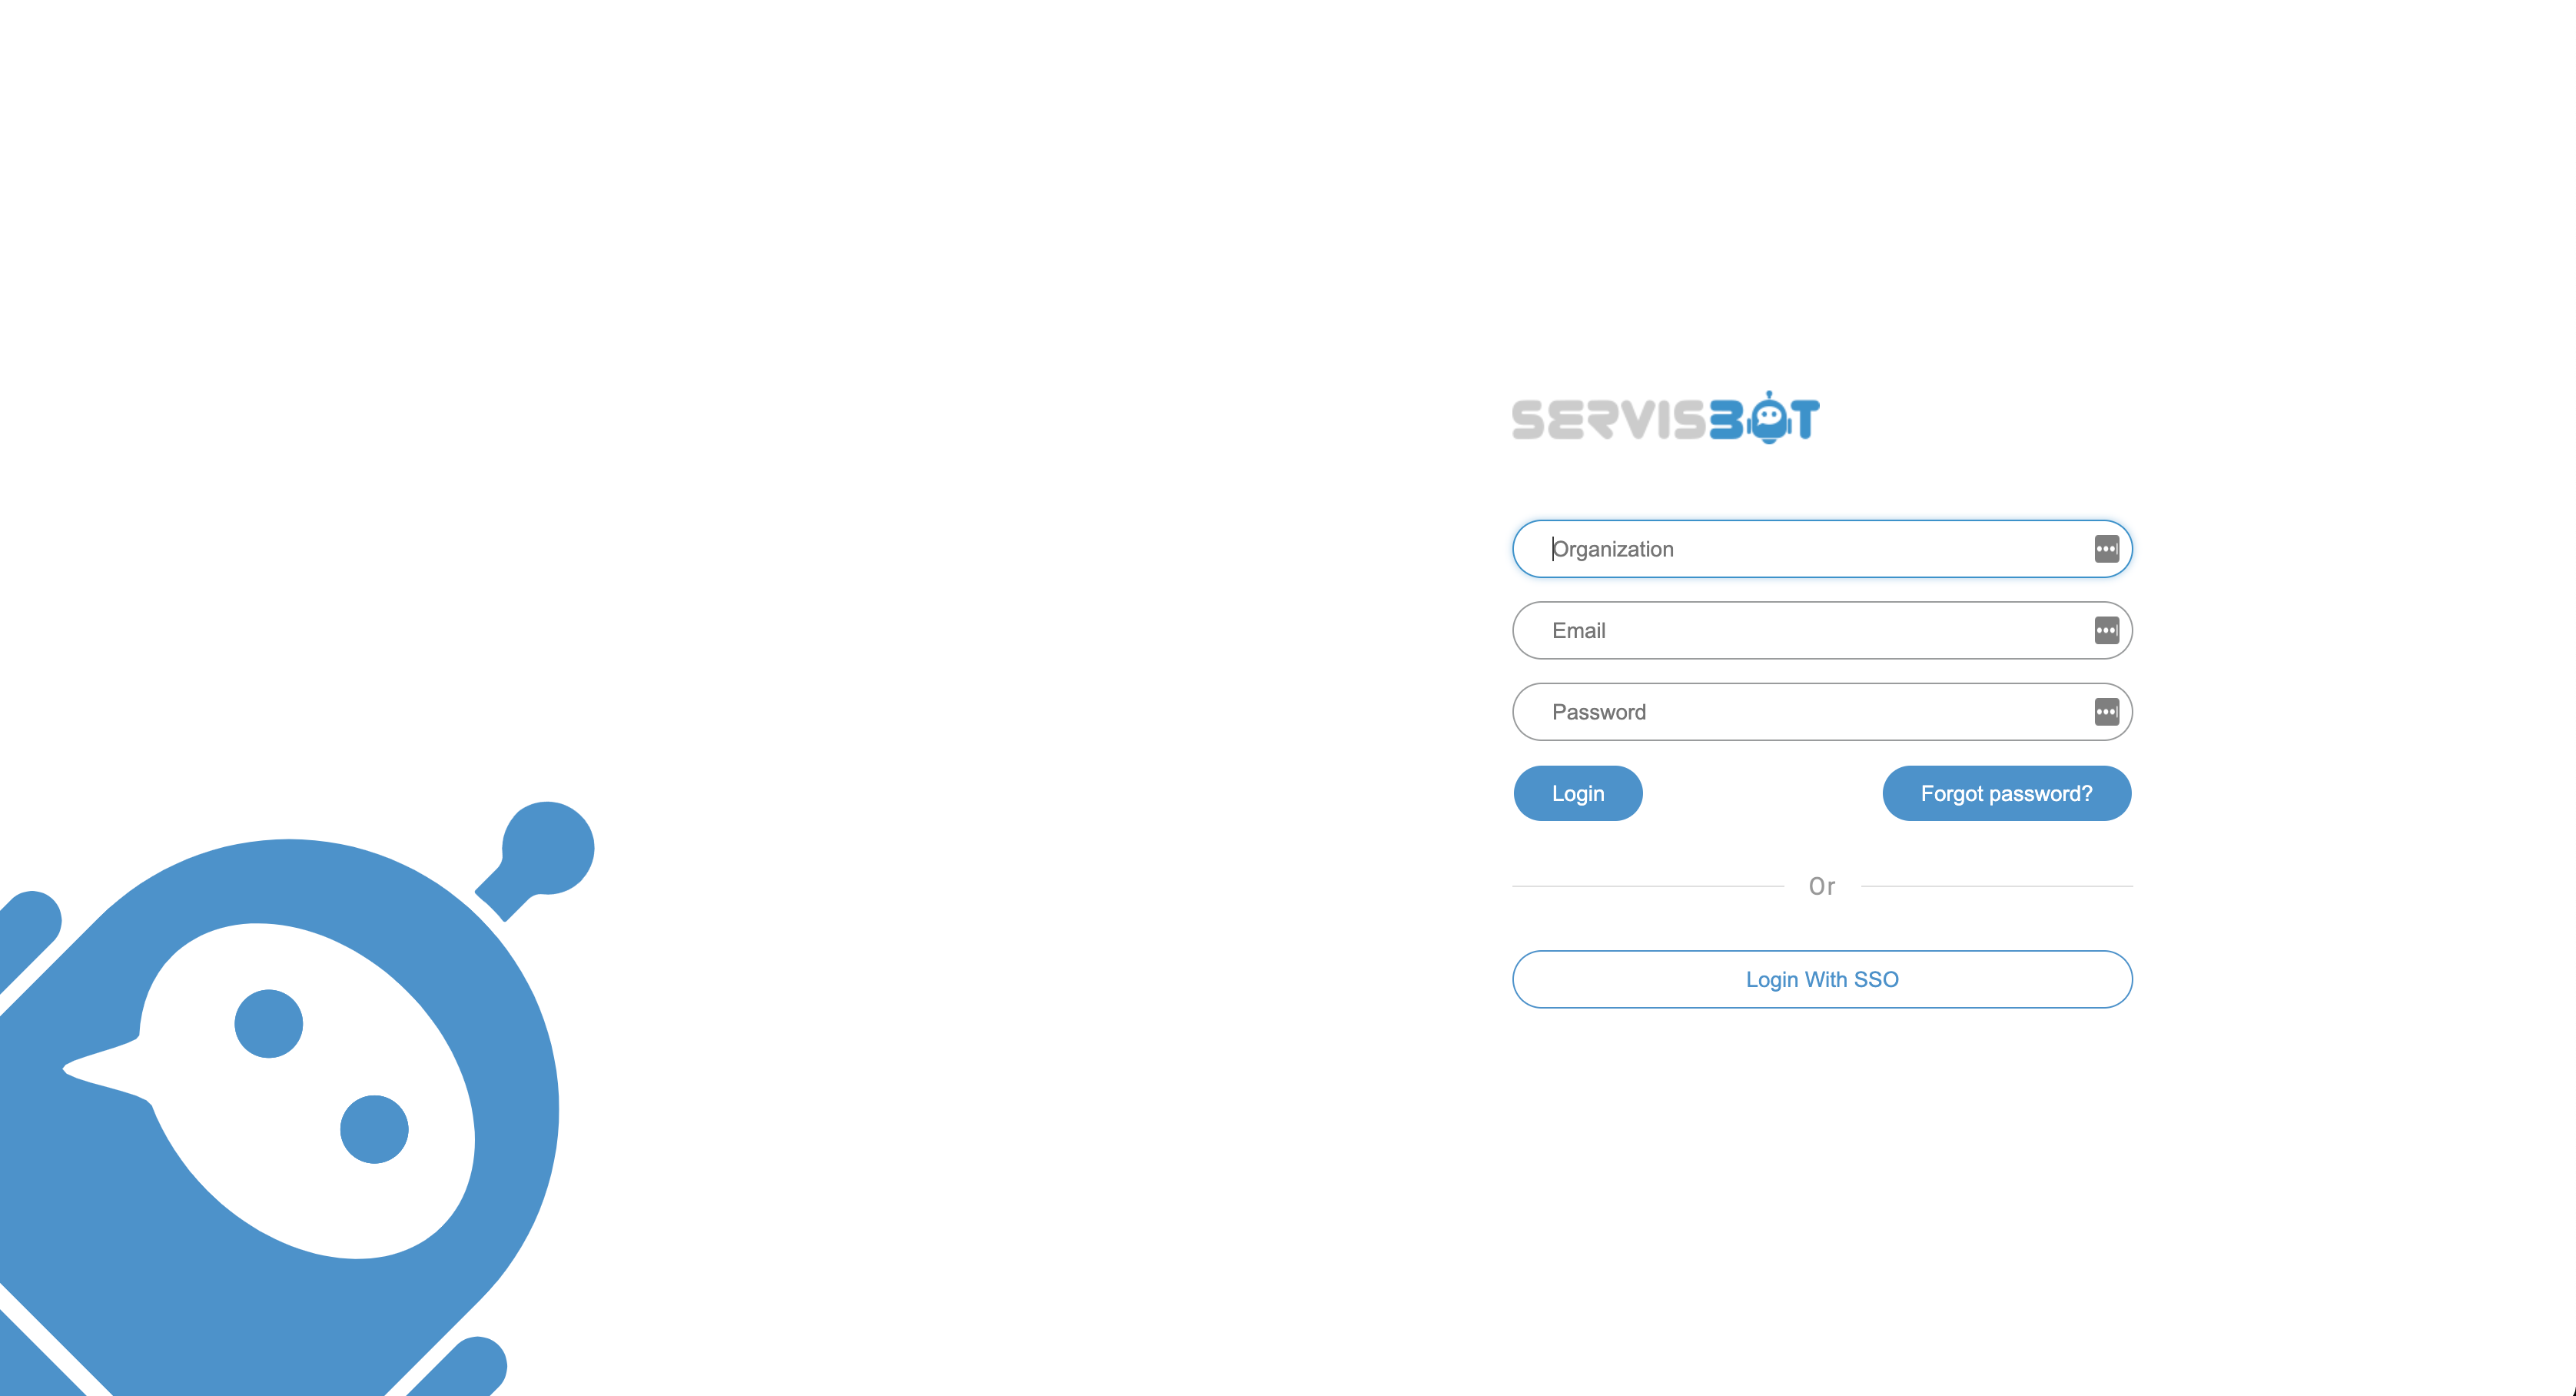
Step 3: Initial Login to Portal
An application admin from your organization should visit the ServisBOT Portal and click Login with SSO as shown below:
Once logged in you will notice that you have no ServisBOT Roles to access features. Please contact ServisBOT at this point and your user will be configured with the permissions to view features and also manage users.
Once roles are configured, log back in and you will now have access to both user management and the ServisBOT features required to build your experience.
Step 4: Adding Additional Users
It is at this stage that additional users should log into the ServisBOT Portal. Like before, users will not have any ServisBOT Roles, it is now up to your organizational administrator that has a fully configured user from the previous step to add the roles to the new users. The administrator may create additional users with the capability to manage users.
Role Management for SSO Users
In ServisBOT it is possible to allow the identity provider to manage the roles of users.
Okta Example
Example of configuring Okta to manage roles for users.
- From the Okta Admin Dashboard select
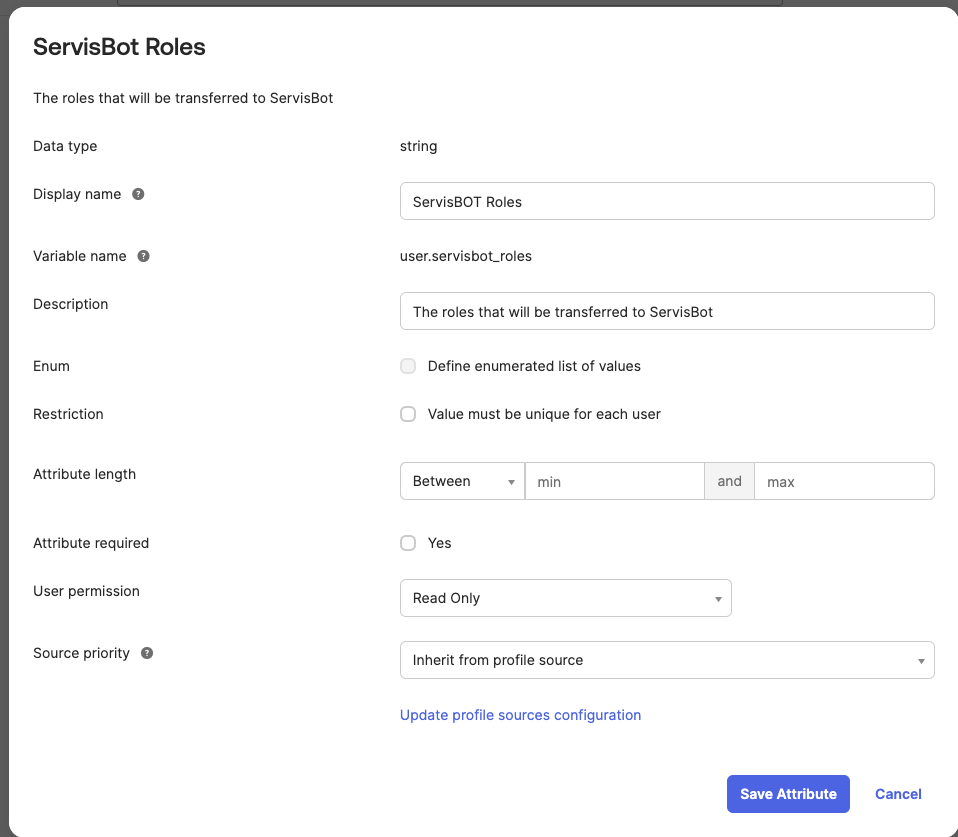
Profile Editorfrom theDirectorymenu. - Update the Okta default user profile to include a new attribute called with a display name of ServisBOT Roles and a variable name of
servisbot_roles. This should be astringtype.
- In the
Profile Editorfind the application that requires the use of theservisbot_rolesuser attribute. This will be named**application** OIDC User - Add a new attribute to the
**application** OIDC User. This can be named as required but the name needs to be communicated with ServisBOT.

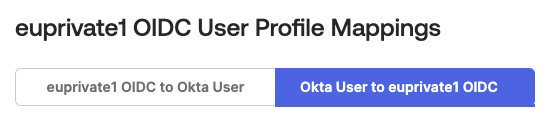
- In the
Profile Editorthe application that you have been modifiying has aMappingsbutton - At the very top of the
Mappingsmenu there is two tabs. Select theOkta User to **application**tab
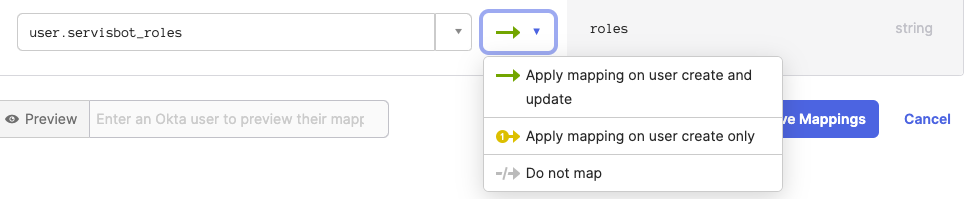
- In the list of mappings the attribute that you created in step 4 should be visible on the right hand side. Select the
servisbot_rolesattribute on the left hand side. - Ensure the mapping applies on user create and update and save!
- Now when you create a user in Okta you can add the
servisbot_rolesattribute to the user and assign the roles that you want the user to have in ServisBOT.
** Note ** At the time of writing Okta does not appear to support adding attributes to a users profile using groups. This means that you will need to add the attribute to each user that you want to have access to ServisBOT.
Role Format
More information on ServisBOT Roles can be found here.
The string should be the following format:
{"roles":["master-bot-builder","bot-builder","bot-manager","data-scientist","it"]}The items in the array should be the roles that you want the user to have in ServisBOT.
Here is a sample of the roles being configured on a users profile in Okta:
