ServiceNow Worker
Summary
ServiceNow (SNOW) has enabled API access to bots built within SNOW. We are using the Virtual Agent API whereby the SNOW Virtual Agent acts as a “Secondary bot”.
ServisBOT is integrating into SNOW so that ServisBOT customers can:
- Access existing workflows in ServiceNow via ServisBOT experiences like L2 messenger.
- Add ServiceNow capabilities into larger Virtual Assistant experiences.
Limitations:
- ServiceNow will operate as a Remote BYOB bot. No programming / altering of the ServiceNow bot will occur via ServisBOT automation.
Creating a ServiceNow Worker through CLI
Save this json to a file and create a worker using the cli command sb-cli worker create file.json
{
    "Data": {
        "Url": "https://dev64116.service-now.com/api/sn_va_as_service/bot/integration",
        "ServiceNowBasicAuthCredentials": "srn:vault::my-org:secretdoc:basicauthcreds",
        "VaProviderMessageAuth": "srn:vault::my-org:secret:servicenowkey",
        "NluConfidenceThresholdOverride": 0.9,
        "ResponseApiKey": "API_KEY_FROM_BASIC_AUTH_PROFILE"
    },
    "Organization": "my-org",
    "Config": {},
    "Enabled": true,
    "Updated": 1620644024351,
    "Description": "work work",
    "Id": "b9df9533-2e4e-4512-8fea-659ab92fd35f",
    "Type": "servicenow-worker",
    "Name": "servicenowtest",
    "Created": 1620644024351,
    "Status": "published",
    "Srn": "srn:botnet:region:my-org:worker:b9df9533-2e4e-4512-8fea-659ab92fd35f"
}
- Url: The URL of the service now integration
- ServiceNowBasicAuthCredentials: A secret document, of format
{ "username" : "username", "password" : "password" } - VaProviderMessageAuth: A secret containing the token value required for the VA provider
- NluConfidenceThresholdOverride: The confidence threshold that must to stop the working passing onwards
- ResponseApiKey: The value ServiceNow sends as an API Key to talk to ServisBOT. The
passwordportion of a basic auth profile configured as part of the REST Message HTTP Method.
Getting Started Guide
- Setup a worker in ServisBOT
- Use CLI to set up the worker (shown above)
- Configure ServiceNow to work with ServisBOT
- Ensure account is setup properly
- Webhook must be pointing at ServisBOT
- Test
- Look at metrics
SNOW Account Setup
Signing Up
- Visit https://developer.servicenow.com/dev.do and sign up for an account
- Activate your account with the email sent to you
- Return to https://developer.servicenow.com/dev.do and sign in with the account just created
- After logging into your account for the first time you will be prompted with ‘Do you code?’

- For this setup we are going to use the ‘developer oriented IDE’’. Select ‘Yes’
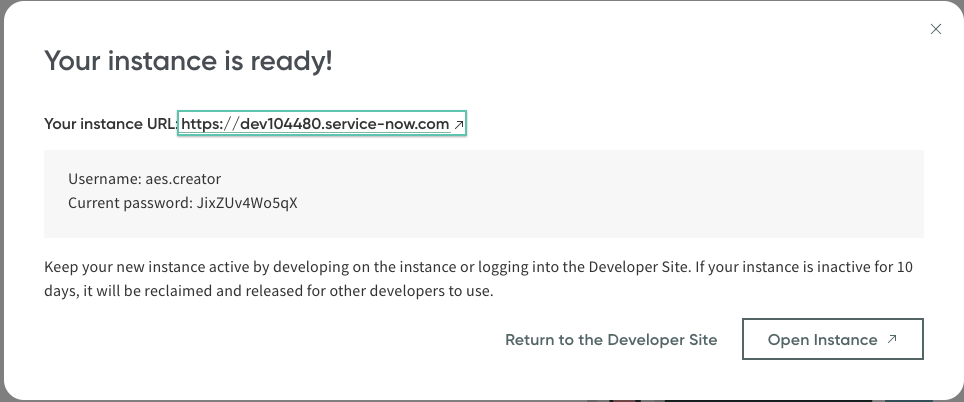
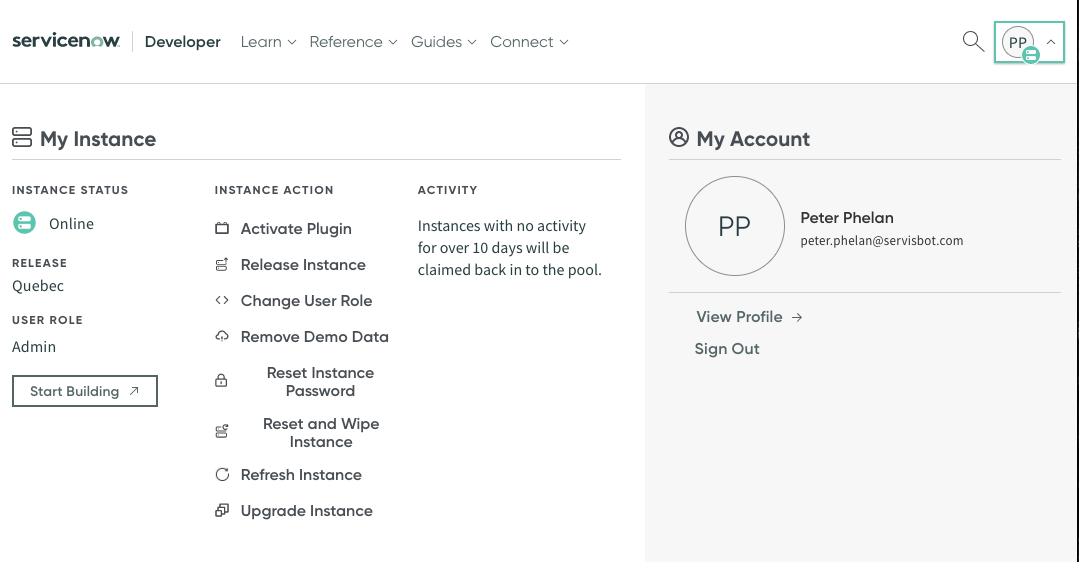
After the initial setup a popup will appear after a short period of time with your created instance. Keep track of these credentials
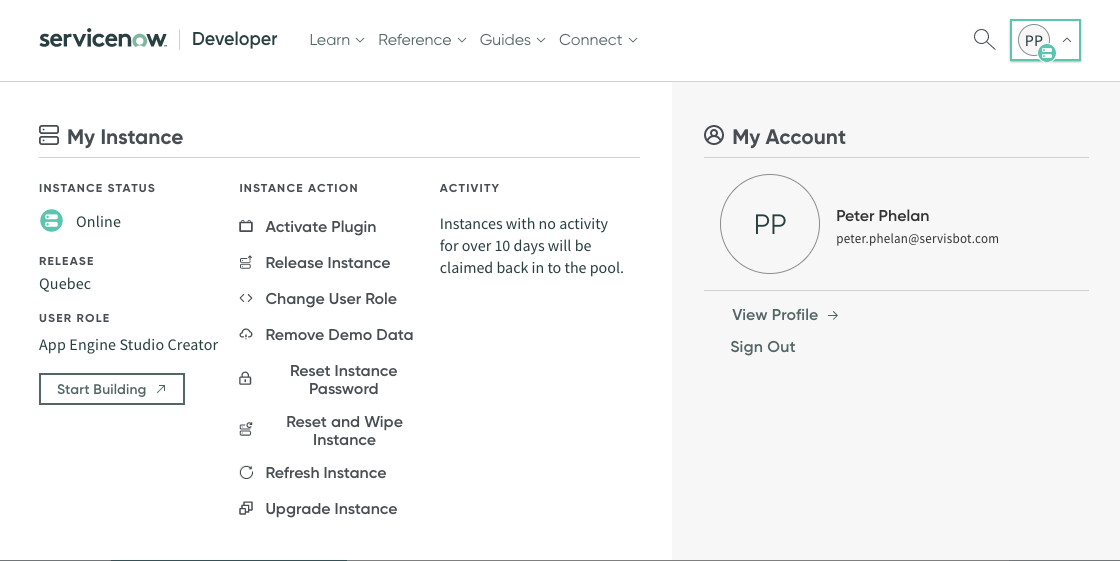
Installing Required Plugins
- Open your profile on https://developer.servicenow.com/dev.do
-
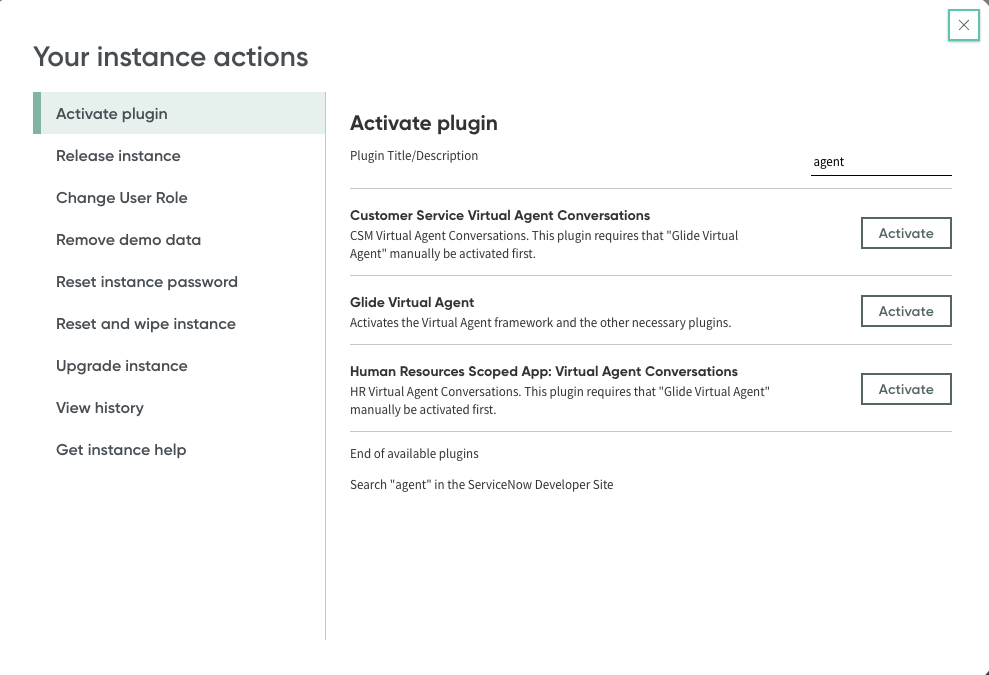
Select Activate Plugin
-
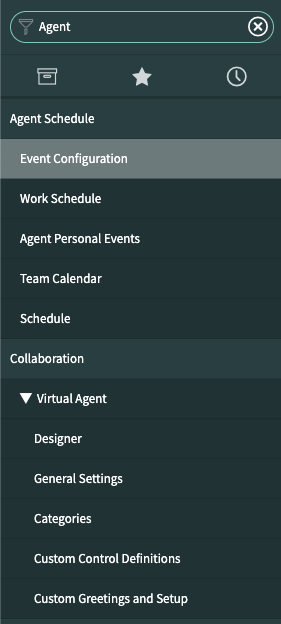
Use the search box to search for ‘agent’
-
Activate the required plugins (This may take some time)
- ‘Glide Virtual Agent’
- ‘Customer Service Virtual Agent Conversations’
Visiting Your Instance
Go to your instance using the ‘Start Building’ button located in your profile at: https://developer.servicenow.com/dev.do
Creating a Simple Topic
- Enter the virtual agent designer (Collaboration -> Virtual Agent -> Designer)
- Click ‘Create’
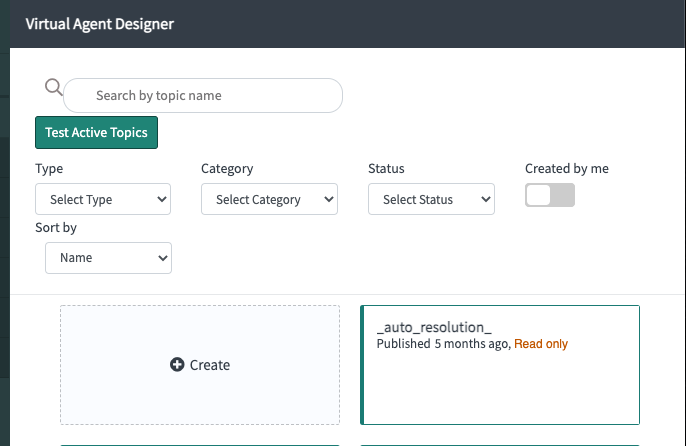
- Add a name
- Select the type of ‘Topic’
- Add a keyword if none exists, remember this keyword for later
- Click ‘Create’
After creation you will be brought to the flow designer
- Add a ‘Text’ Bot Response block between the start and end and configure the response message & name fields.
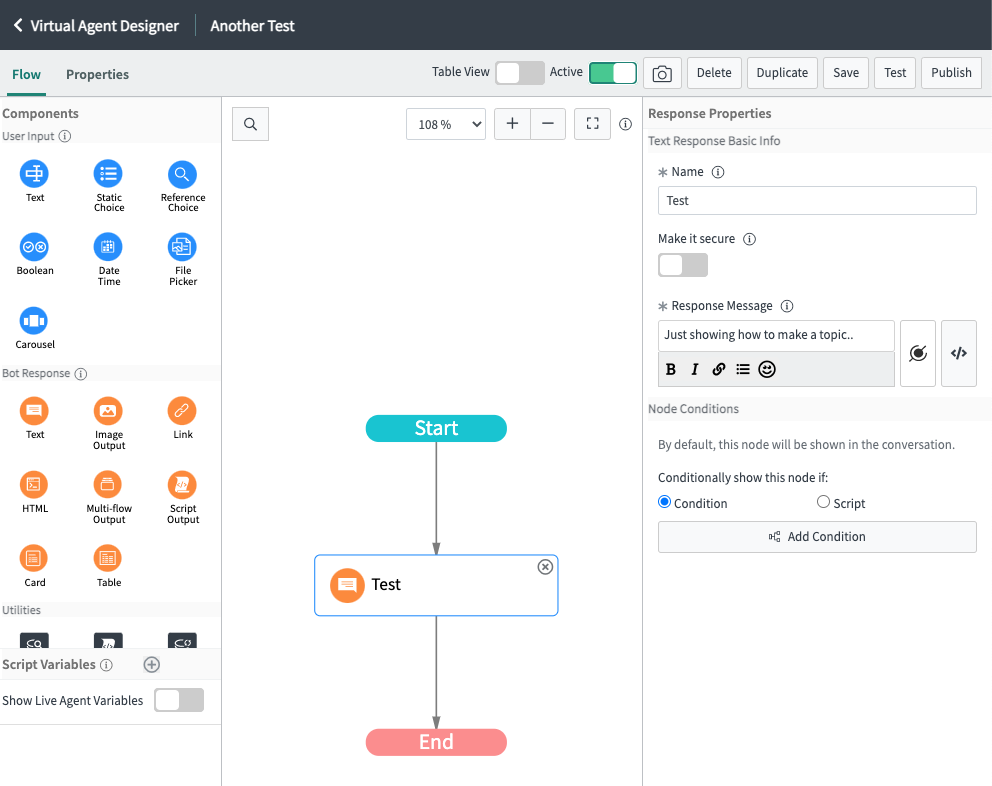
- Save, Toggle the flow to ‘Active’, Publish
Adding the VA to ServiceNOW
- Navigate to
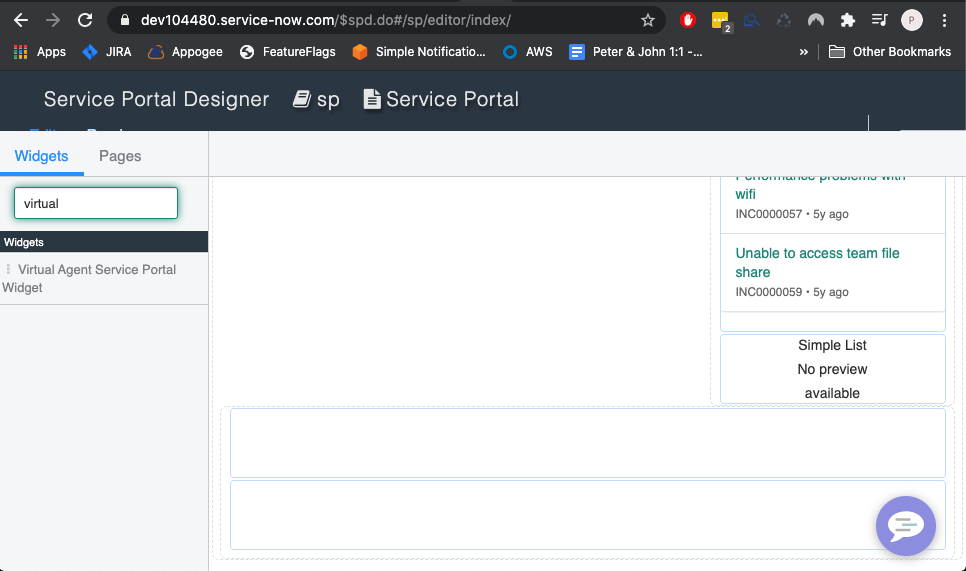
https://<YOUR_INSTANCE_ID>.service-now.com/sp - CTRL + Right Click on an element in the portal of your instance
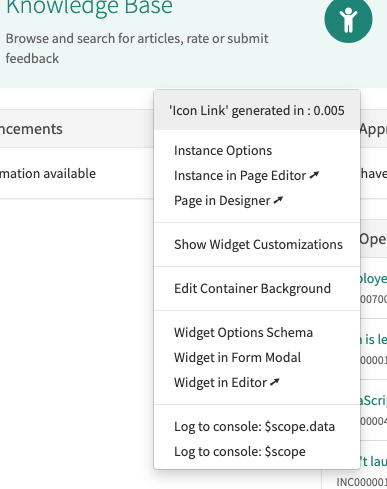
- Click ‘Page in Designer’
- Search for ‘virtual’ and drag and drop the ‘Virtual Agent Service Portal Widget’ into the footer of the page
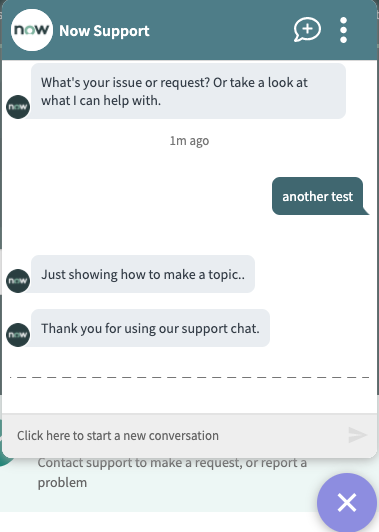
The Virtual Agent will be added in the button right corner on your instance (https://<YOUR_INSTANCE_ID.service-now.com/sp), test out the topic you made now by typing your keyword!
Install the Virtual Agent API
- Return to
https://<YOUR_INSTANCE_ID>.service-now.com/ - Navigate to System Applications -> All Available Applications -> All
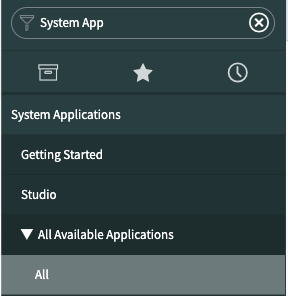
- Search for ‘Virtual Agent API’
- Install the Virtual Agent API
Connect to ServisBOT
Your ServisBOT representative will provide you with your username password combination & the endpoint required for you to communicate with.
SerivsBOT -> ServiceNOW Webhook URL:
EU1:
https://webhook.eu1.servisbot.com/v1/ORGANIZATION/ServiceNow/ReceiveResponse
US1:
https://webhook.us1.servisbot.com/v1/ORGANIZATION/ServiceNow/ReceiveResponse
For these URLs, substitute ORGANIZATION for your organization name.
Note ServiceNow is not an endpoint name, but part of the API route. This API does not need to know the endpoint of your bot.
ServisBOT Instructions:
We’re going setup ServiceNOW to send it’s responses to user input back to ServisBOT, for presentation. As part of this step, we’ll create a webhook connection ServiceNOW -> ServisBOT, and authenticate this using a static API key (in this case, the password field of a Basic Authentication provider).
- Retrieve and provide the SerivsBOT -> ServiceNOW Webhook URL for the region your organization is in (see above)
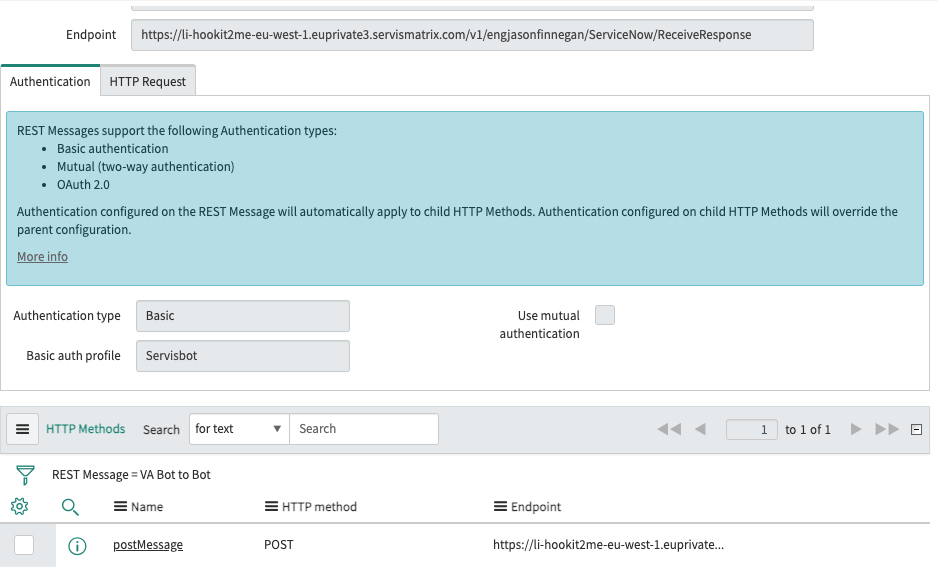
- Navigate to System Web Services -> Outbound -> REST Message
- Open ‘VA Bot to Bot’
- Change the URL you have been provided with to:
- The endpoint on the base resource
- The endpoint postMessage HTTP Method

- Add Authentication
- Select Authentication Type ‘Basic’
- Use the lookup function on basic auth profile to allow you to create a new profile
- This
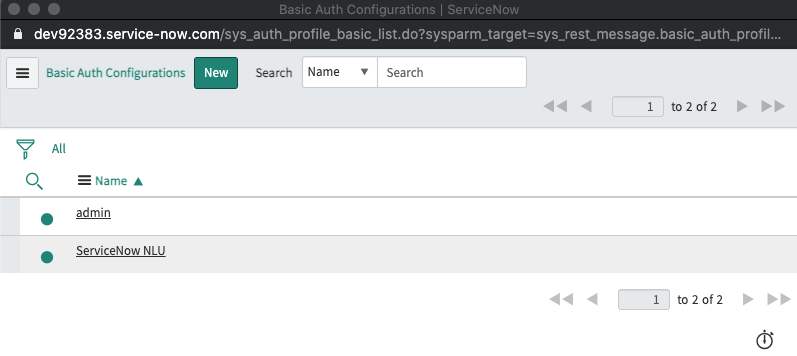
- Create a new profile with a username and password.
- Update to add the newly created profile as the ‘Basic Auth Profile’ on the previous HTTP method screen.
- In ServisBOT, set
Data.ResponseApiKeyon the worker to the plain text value of this basic auth profile. (Just the password - and not as a secret)
Setup a ServiceNow Worker
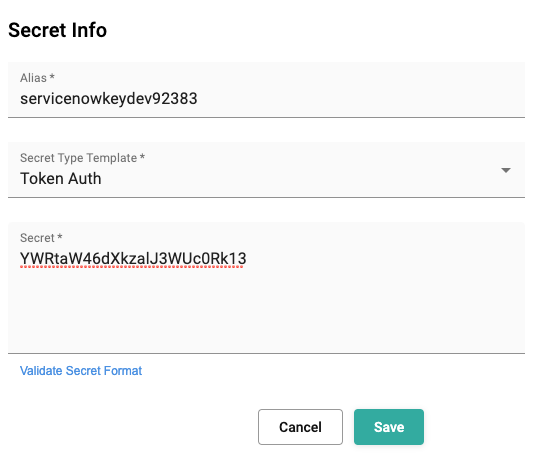
- Create a new secret document in ServisBOT
- Remember the name of the secret
- Set the value of the secret to be
{ "username" : "username", "password" : "password" }
- Create a ServiceNow worker using the ServiceNow blueprint
- Select the secret created in the step above
- Add the URL as:
https://<YOUR_INSTANCE_ID>.service-now.com/api/sn_va_as_service/bot/integration
Enable Image output of HTML elements on the VA Bot to Bot API:
Many of the flows output HTML as part of their responses to users. Because ServiceNow integrates with services like MS Teams and Slack where HTML support is not available, they have a configuration option to enable image output of HTML elements, which can be set on the VA Bot to Bot provider.
- In the filter view, type
sys_cs_provider.listand push enter

- Select the VA Bot to Bot Provider in the list, and open this record.
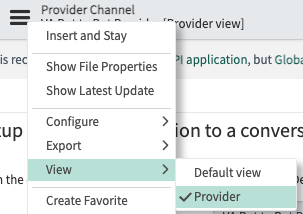
- Switch application scope to enable editing by clicking the “here” link in the header warning

- Modify the view mode of this record by clicking the Hamburger menu -> View -> Select “Provider”
- Tick the “HTML to Image Conversation Required” check box
- You will be forced to pick a Version. Select “1.0.0”
- Click “Update”.
- Images will now be output as well as HTML in Bot to Bot API responses. You can verify by observing the presence of an “imageUri” when receiving HTML content from a flow.
Setup Account Linking
- Navigate to token_verification_list.do using the filter navigator (paste and press enter)
- Create a new token verification. The value of this token is of your choosing.
- Create a plaintext secret in the system, matching the value of this token.
- This token will be set in the worker as
Data.VaProviderMessageAuthto the secret SRN

- Navigate to message_auth_list.do using the filter navigator (paste and press enter)
- Create a new message auth
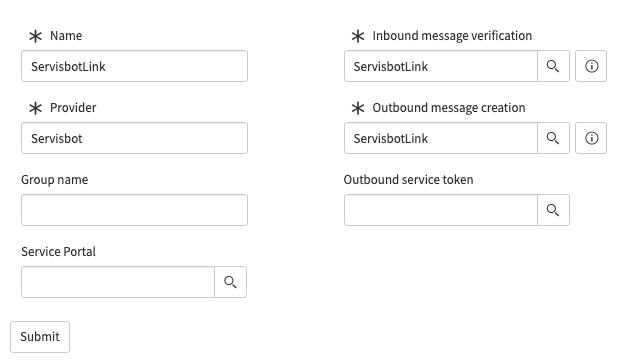
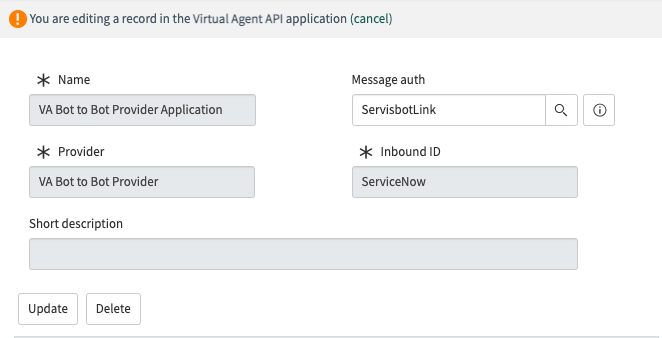
- Navigate to sys_cs_provider.list using the filter navigator (paste and press enter)
- Open the ‘VA Bot to Bot Provider’ record
- Open the ‘VA Bot to Bot Provider Application’ in the Provider Channel Identity section
- Edit the record to add the Message Auth you created
Enable Live Agent handoff
Relevant ServiceNow Documentation Page
- The logged in user needs to be added to a Chat Queue Assignment Group. Navigate to the Chat Queue configration page. https://dev64116.service-now.com/chat_queue_list.do
- Select every
Assignment Grouplink in the list.
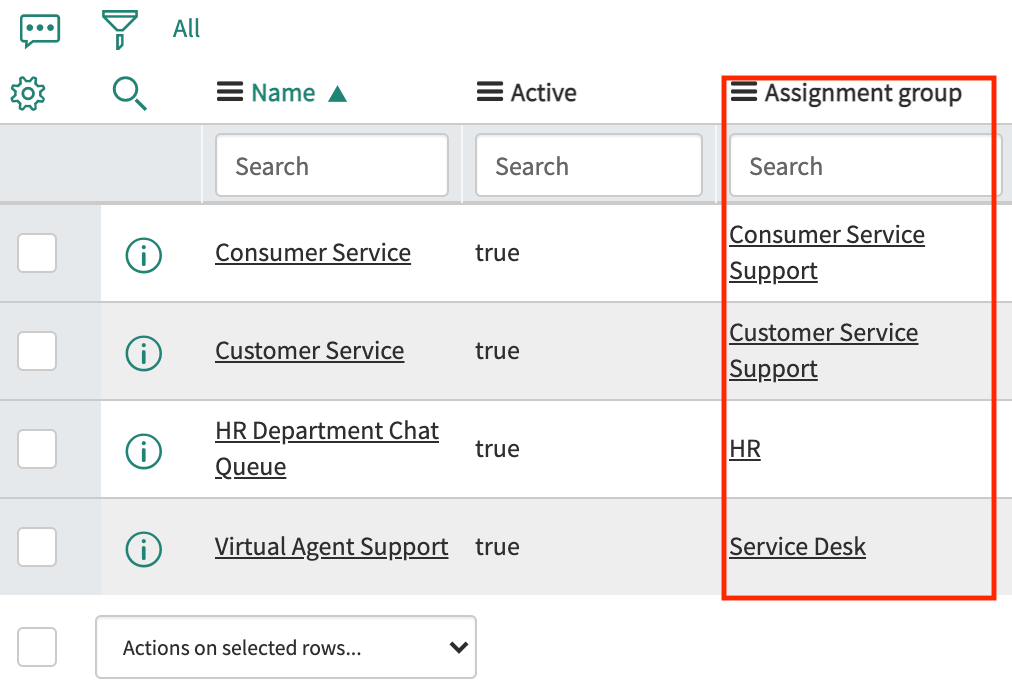
- For each
Assignment Group, Select Group Members tab and clickEdit...button. - Add
System Administratorto each assignment group. - Log into the Live Agent portal, where you will be assigned conversations.
https://dev64116.service-now.com/now/workspace/agent
- Set Status to available
- Trigger a live chat using the bot from the support page: https://dev64116.service-now.com/sp (Select “Live Agent”, or type “agent”)
Diagnostics
System Logging:
System logging produces a wide array of informational messages relating to the behavior of the VA Bot to Bot API plugin. These messages are available at: https://dev64116.service-now.com/syslog_list.do?sysparm_query=sys_created_onONToday%40javascript%3Ags.beginningOfToday%28%29%40javascript%3Ags.endOfToday%28%29&sysparm_view=
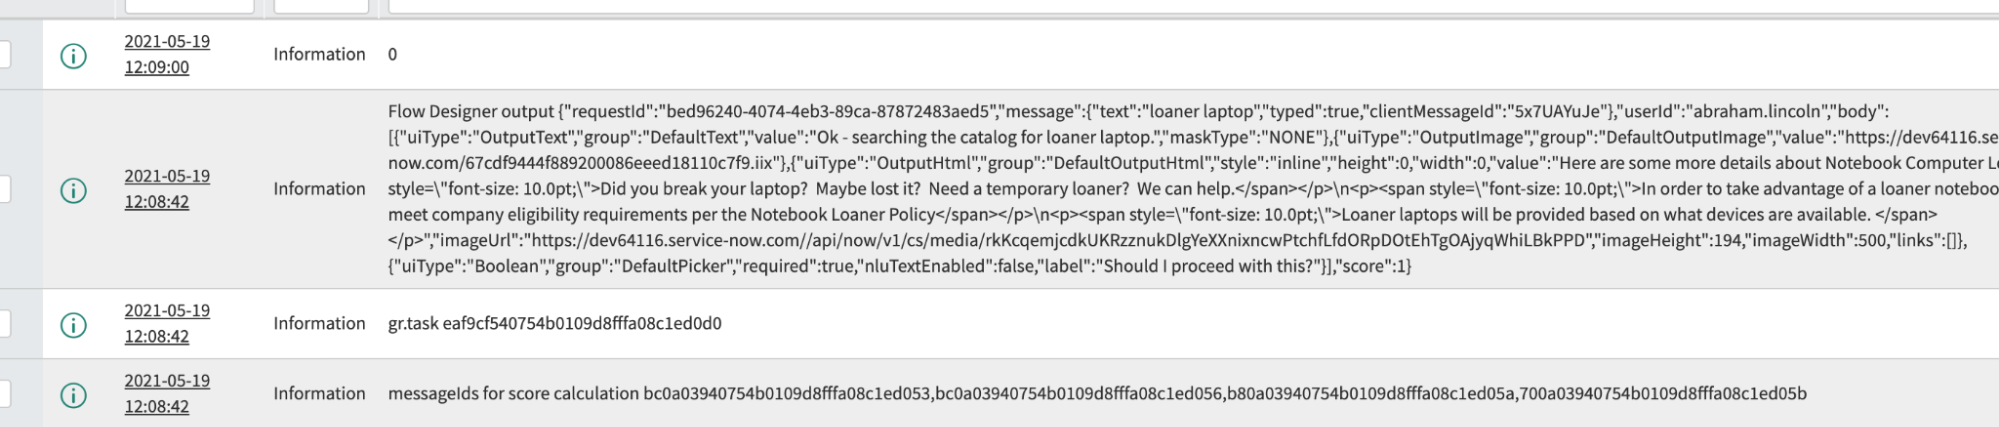
The list should be sorted by Created

Interaction Logs
When comparing the performance of the ServisBOT integration with that of the Service Page bot widget, the Interaction Logs for one conversation versus another can be a useful resource. These are available here: https://dev64116.service-now.com/interaction_log_list.do?sysparm_nostack=true&sysparm_query=&sysparm_first_row=1&sysparm_view=
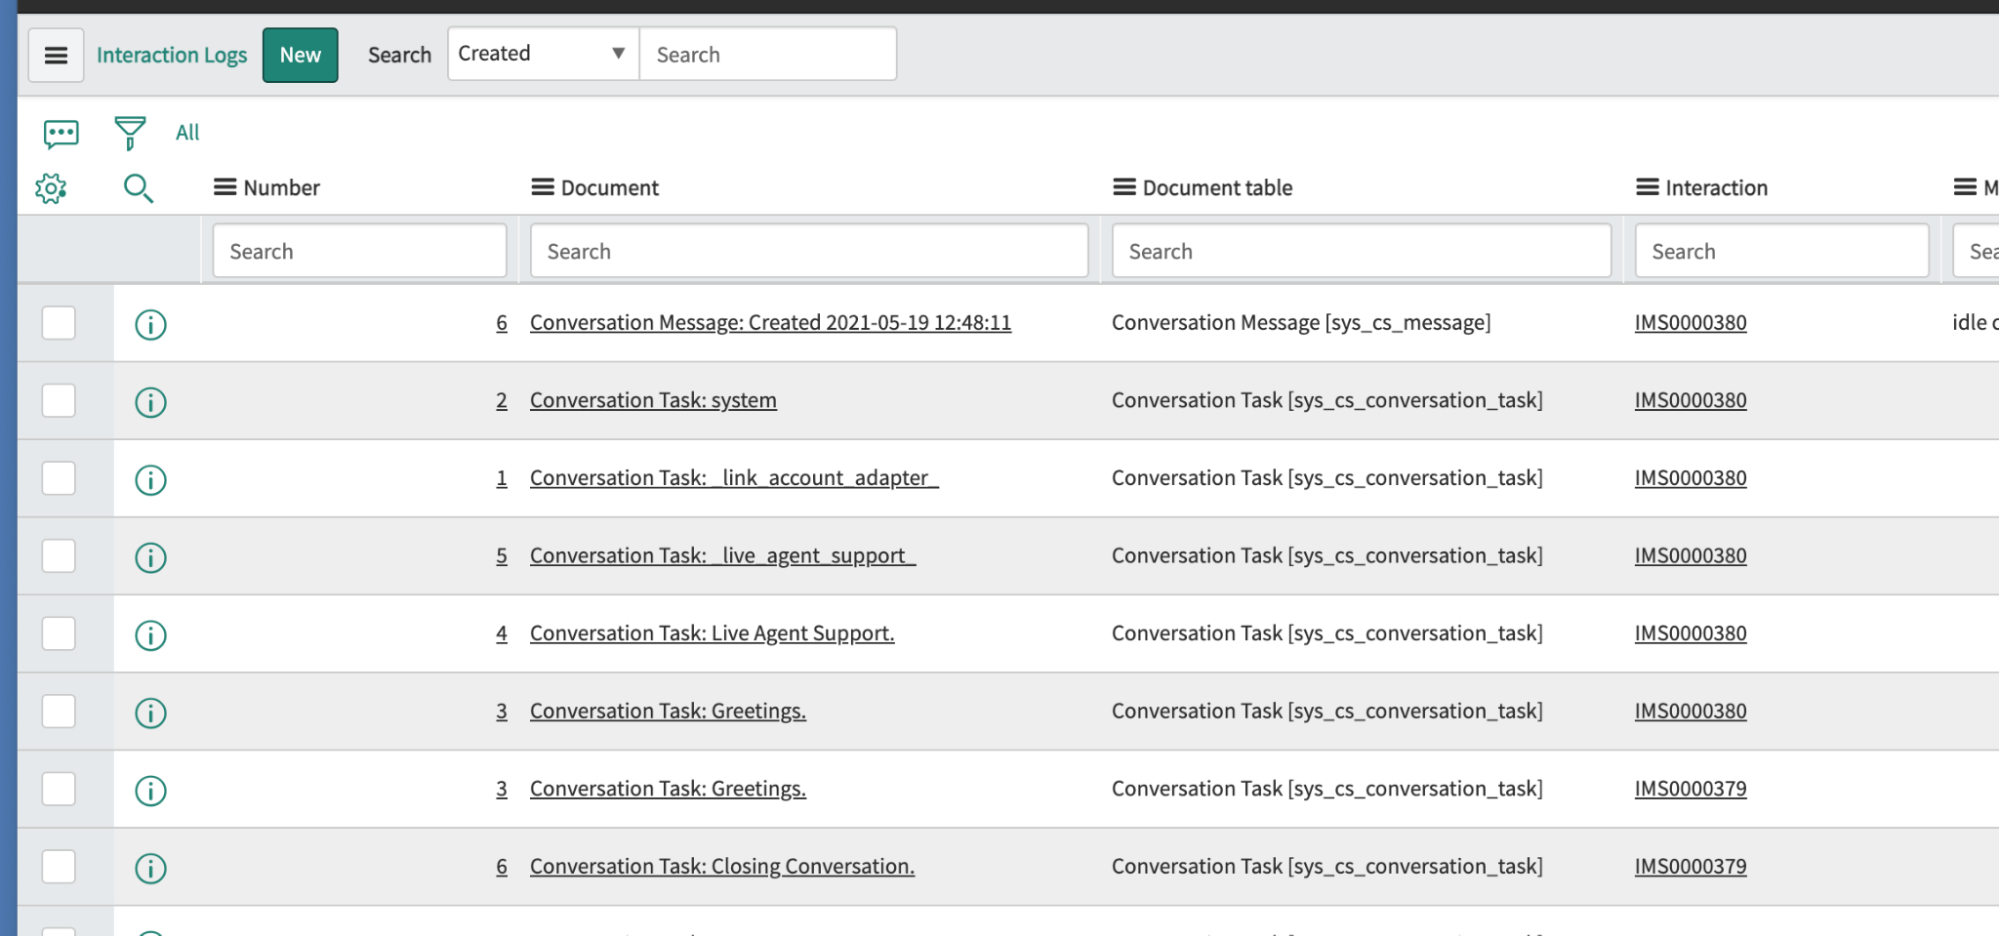
The listing is not particularly useful unless sorted by Created - which may be a hidden field heading in the default view. Add by clicking the Cog leftmost of the table headings. Then, sort by date.
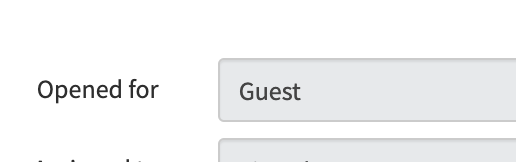
Each conversation with a bot (ServisBOT or from the ServiceNOW Widget) will generate an Interaction. This record can be opened by clicking on it’s interaction number. These increase sequentially.
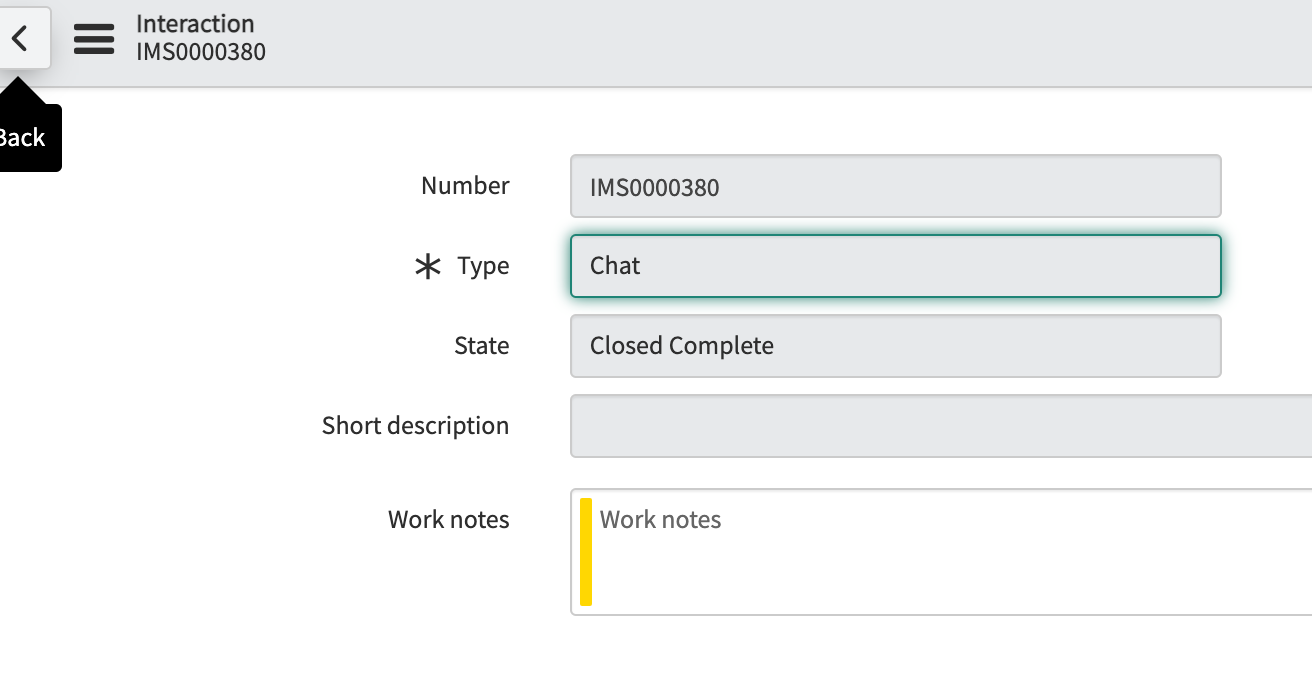
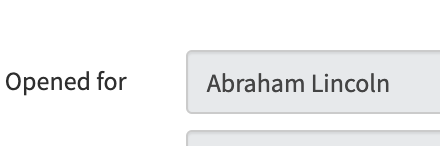
To validate User Linking is working as expected, verify the Interaction Record was Opened For the provided User ID, and not Guest.
Correct:
Incorrect: