Watson Workers
Type: NLP Worker
A Watson worker takes user input and sends it to Watson bot for natural language processing. A Watson worker can be created through the CLI, or through portal.
Creating a Watson Assistant
The following contains useful documentation on getting started with a Watson Assistant, which will be needed in the next sections https://cloud.ibm.com/docs/assistant/services-information.html
Assuming you have setup a Watson Assistant, you can find the required information for creating a watson worker within Watson by following these steps:
-
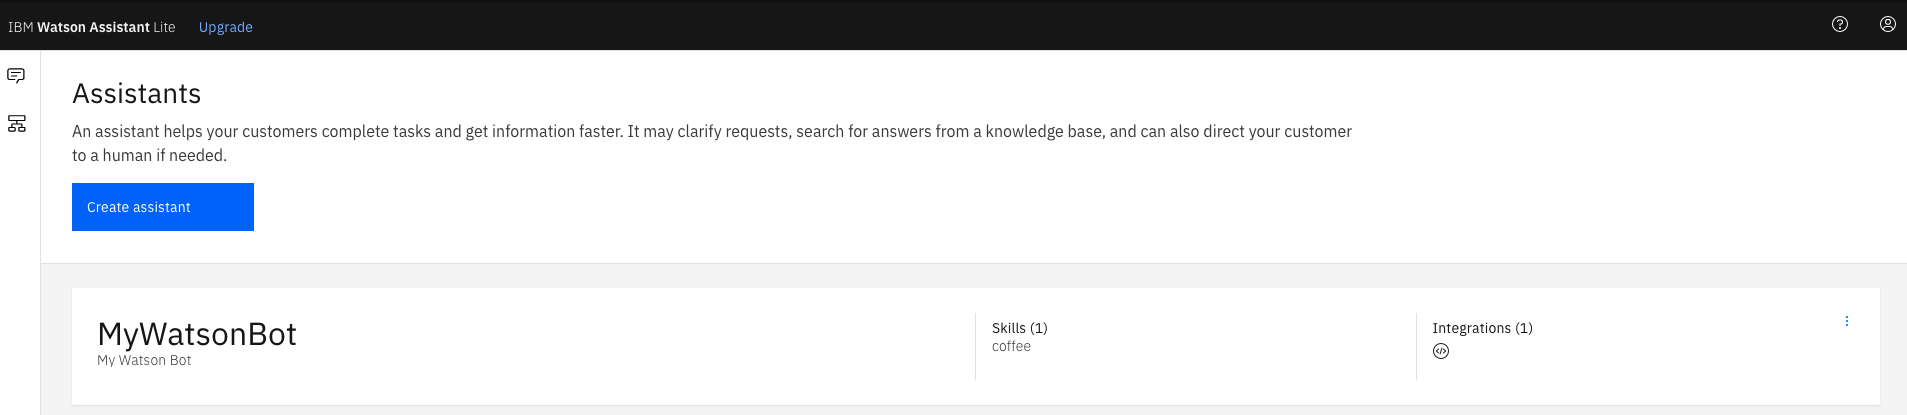
Navigate to the the Watson Assistants dashboard, which looks like this
-
Navigate to the settings of your Watson Assistant by clicking the
Settingsoption here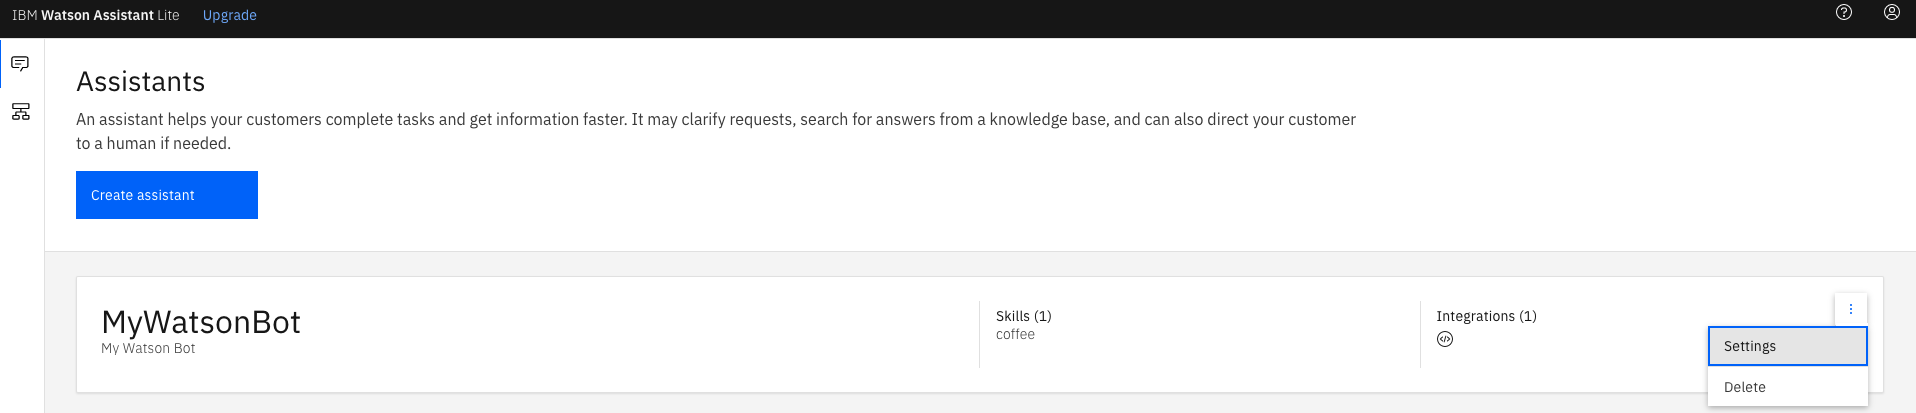
-
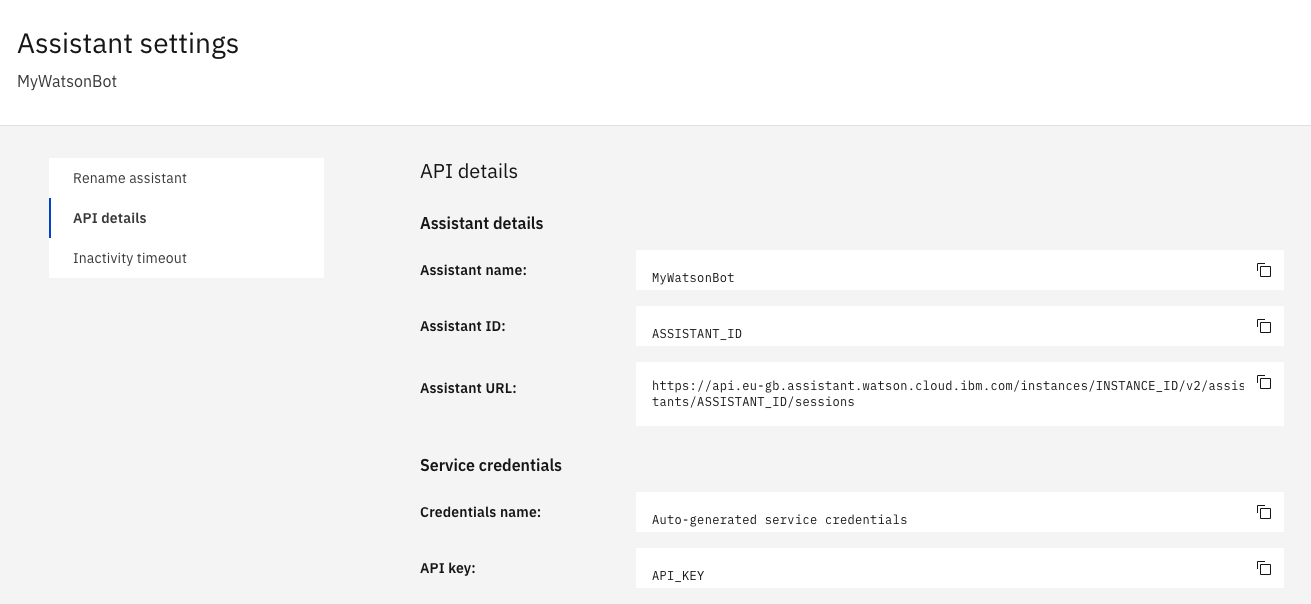
Click on the
API detailstab, and take note of the following:- Assistant ID
- Assistant URL
- API key
The page should look something like this:
Details for Watson Worker Configuration
Once you have this information, you can derive the details which will be required for creating a watson worker:
-
Secret: The secret is the Watson Assistant API key that will be used to communicate with Watson. This is the API Key mentioned above on the Watson Assistant API Details section. See Creating a Watson Secret for more information on creating the secret.
-
AssistantId: The identifier of the particular assistant you wish to use hosted in the assistant resource, this is available on the Watson Assistant API Details page.
-
ServiceUrl: The Watson service url to use for communicating with Watson. This can be obtained from the
Assistant URLyou retrieved from the API Details section of your Watson Assistant. The Watson Assistant URL will be in the formhttps://api.eu-gb.assistant.watson.cloud.ibm.com/instances/some-id/v2/assistants/some-id/sessions. YourServiceUrlfor your worker configuration is just this section of the urlhttps://api.eu-gb.assistant.watson.cloud.ibm.com. -
AssistantInstance: The identifier of the watson assistant resource, this can be taken from the
Assistant URLyou retrieved from the API Details section of your Watson assistant. The image highlights the section of the url which contains the instance id. -
NluConfidenceThresholdOverride [Optional] You can use this as an override of the returned detected intent confidence. If this value is higher than that returned from the nlu provider it will change the response to be a fallback, this value defaults to 0.

- You can now create a secret using your Watson Assistant API Key, and a watson worker using the cli or portal, using information gathered above.
Creating a Watson Secret
- You must create a secret using the
API Keythat you got from the API Details page of your Watson Assistant. - To do this with the cli do the following
- sb-cli secret create-interactive.
- Enter the name of your secret.
- Choose
secret. - Paste your API Key when prompted.
- To do this using portal do the following:
- Navigate to the
Secrets Managementsection. - Click
Create Secret. - Enter the alias for your secret.
- Select
Watsonas your Secret Type Template. - Paste your API Key into the
Secrettext area. - Click save.
- Navigate to the
Creating Watson worker through the cli
Save this json to a file and create a worker using the cli command sb-cli worker create file.json
{
  "Data": {
    "NluConfiguration": {
        "AssistantId": "AssistantId",
        "AssistantInstance": "AssistantInstance",
        "Secret": "SRN:::HERE",
        "ServiceUrl": "https://api.eu-gb.assistant.watson.cloud.ibm.com",
        "NluConfidenceThresholdOverride": 0.8
      },
    "NluType": "Watson"
  },
  "Organization": "ORGANIZATION",
  "Config": {
    "Avatar": "default-bot"
  },
  "Enabled": true,
  "Updated": 1608652074324,
  "Description": "A Watson worker",
  "Id": "4685b16c-a305-4b0c-b33d-8ae12b81ff9a",
  "Type": "nlp-worker",
  "Name": "WatsonWorker",
  "Created": 1608652074324,
  "Status": "published",
  "Srn": "srn:botnet:REGION:ORGANIZATION:worker:4685b16c-a305-4b0c-b33d-8ae12b81ff9a"
}
Once you have created the worker using the CLI, it will return an ID for you. You need to then update/create a bot and place the worker at the top with the id and the type of nlp-worker
Creating Watson worker through portal
You can create a watson worker using portal by navigating to your bot, and clicking on the resources tab.
- Click
Add Resource - Click
Watson Workerand then clickNext. - Fill in the details of your Watson worker.