Yelp Api Connector Bot
ServisBOT BaaS is the home for mappings between the ServisBOT platform and external services such as APIs and SDKs. The easiest way to see the power of a BaaS is build one using our out-of-the box blueprints, and build a demo bot.
Blueprints can contain more than just one ServisBOT bot building block. There are blueprints for just BaaS items, or just bots with workers, and then there are also blueprints with all three.
Yelp Search BOT
In this example we will guide you through the steps to create and test a Yelp BaaS API connector, then extend a basic classic flow conversation with it.
Requirements
- Access to Yelp Fusion and an API Key
- Access to ServisBOT Portal
Build a Classic Flow Bot from Blueprint
- Go to the
Bot Armytab - Click on Create BOT and from the drop-down
From Blueprint - Select the “ServisBOT Flow” Blueprint
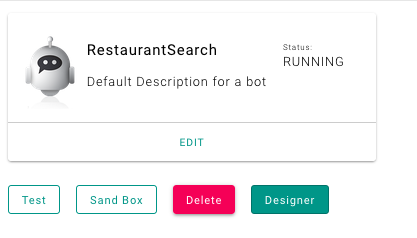
- Name this bot
RestaurantSearch - Enter anything for the description
- For the welcome message, we want to let the user know that this bot can help them find a restaurant
Hi, how can I help? - Click create
- If building was successful, click
Finish. - We will come back to this area later.
Build a Yelp Api Connector from Blueprints
- First set up your secret, containing your API Token
- You’ll need to create a Yelp Fusion API key
- Go to
Secrets Managementin portal - Click
Create Secret - Select
Token Authas your Secret Type Template from the creation page - Replace
APIKEYwith your Yelp key - Hit save
- Time to move on to creating the API Connector
- Go to
Integrations - Click on
Create Connectorand from the dropdown menuFrom Blueprint - Select the
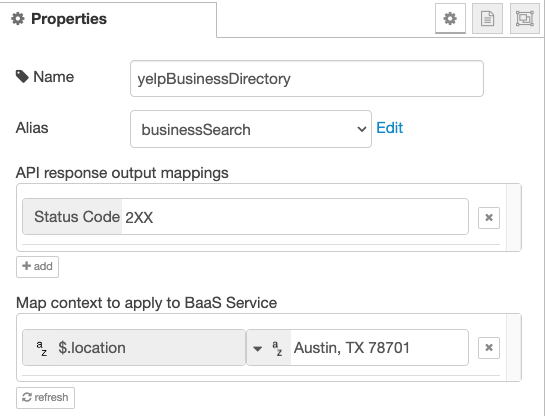
Yelp Business Directory - Enter a Connector Name. Suggested
businessSearch - From the
secretsdropdown, select your recently created secret Create Connectorwill save all of your settings into the platform.
Wire up your bot to the Api Connector
- Go back to the
Bot Armysection of portal and find your bot. - Click on your
RestaurantBot - On the bot’s detail page there will be a button up at the top labeled
Designerwhich will take you to the Classic Flow canvas.
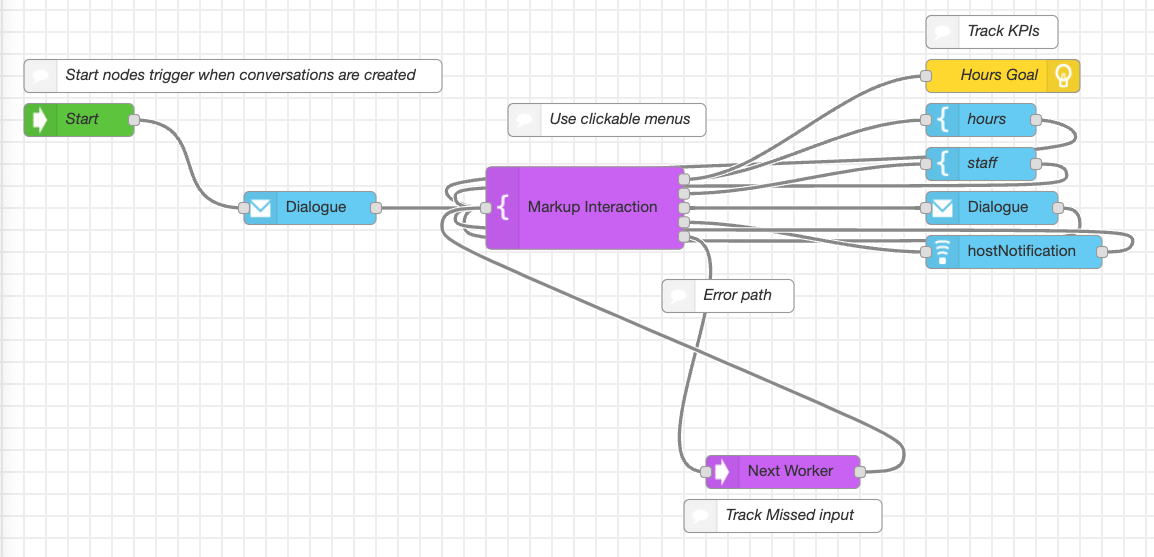
- Your Flow will start off looking like this:
-
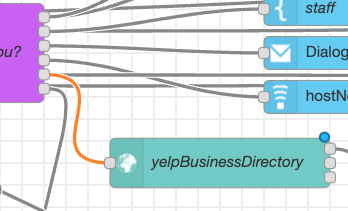
We will begin by editing the purple prompt node
- Double click the purple node
- Add a new option for
Find me a restaurant

- After clicking done, there will be a new 6th output on the node.
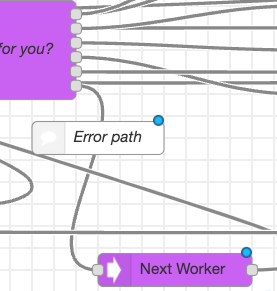
- Rewire the bottom node to the
Next Workernode as the bottom node is specifically for when a user types instead of choosing an option.
-
Drag and drop an apiConnector node onto the Canvas
-
Name it yelpBusinessDirectory
-
Edit the context fields
-
Connect up the fifth output from the prompt node to the apiConnector node
-
-
Process the ResponseMapping
- Drop a
function nodeonto the canvas - In the function body assign the API response to a messenger variable
- Drop a
msg.payload.foodPlaces = msg.apiConnector.yelpBusinessDirectory.response.businesses;
return msg;
- Wire the output from the top port of the apiConnector to the input of the function node
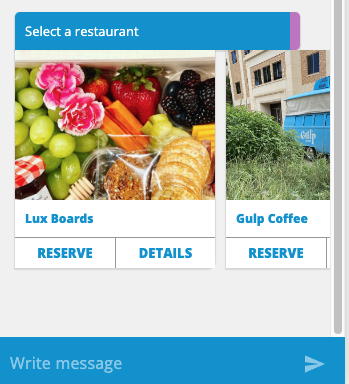
- Set up the markup template. We will use a carousel to display the yelp template.
- Drop the Interaction Node on to the canvas
- Edit the node
- Select ‘Carousel’, ‘Dynamic’ from the ‘Samples’ list
- Add in the following markup.
<TimelineMessage>
  <List title="Select a restaurant" horizontal="true" selectable="true" style="large-icon" interactionType="event" preventRetries="true">
    #foreach($foodPlace in $payload.foodPlaces)
    <Item title="$foodPlace.name" subtitle="" id="$foreach.index" imageUrl="$foodPlace.image_url">
      <Option title="Reserve" id="Reserve"/>
      <Option title="Details" url="$foodPlace.url" urlTitle="See Restaurant Details"/>
    </Item>
    #end
  </List>
</TimelineMessage>
- Wire the output from the function node to the input of the interaction node
Setup the return message and finish wiring
-
Drop a markup node onto the Canvas
-
Wire the output from the interaction node to the input of the markup node.
-
Name it, change
SourcetoMessage Objectand edit the message to bemsg.foodPlaces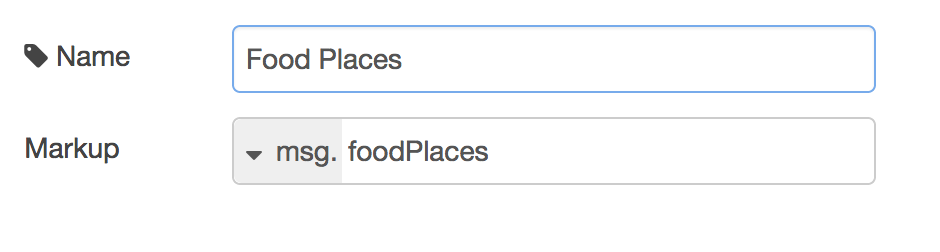
-
Wire the output to the back to the purple prompt node
-
Deploy and test
- Click
Deployin the canvas and navigate back to the bot pages - From the bottom of the test page you can open up a preview window.
- Now when the bot displays the menu, you can select
Find me a restaurant, the bot should send you a list of restaurants in a carousel.
- Click