Use the AWS SDK to Translate Bots
In this tutorial, we will combine a flow-based bot, and an AWS SDK BaaS to create a bot that can detect sentiment and language, and then respond in the matched language.
Set up your Secrets
Since your bot will use three AWS services, you will need access keys, secrets with access to AWS Comprehend, and AWS Translate. You will also need the region for these resources.
You can then create a secret for your bot and connectors to use.
Build your Initial Bot
For this example we will use a classic flow bot.
- Select the
Bot Designermenu item - Click
Create Bot - From the blueprint options, choose
Classic Flow Bot - Name your bot, then set the custom message to
Hi, How are you doing? - Build it, we will come back to this bot later
Build your SDK Connectors
We will need to build three connectors from blueprints.
It is assumed you only created one secret for all three connectors. If you created more than one, update it in step 2 of each connector creation flow.
-
Create the three connectors using AWS SDK templates.(Select the secret you created in the first section of this tutorial)
-
Using the AWS Comprehend Detect Language, create a blueprint named
ComprehendDetectLanguageRequest Mapping:{ "Text": {"type": "requestBody","requestBodyPath": "$.Text","inputPath": "$.Text"}} -
Using the AWS Comprehend Detect Sentiment Blueprint, create a blueprint named
ComprehendDetectSentiment -
Using the AWS Translate Blueprint, create a blueprint named
Translate -
Great! You should now see the connectors in your API connectors List.
Connect Everything Together
-
Prep your Flow
-
Open back up your sentiment bot. (Bot Designer -> Bot name)
-
On the bot detail page click
Designer -
Delete all the nodes except for the first
Dialoguenode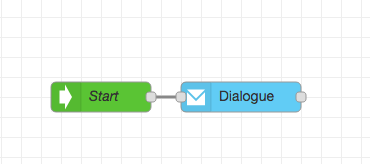
-
Add in Sentiment Detection
-
Drop in an input node right after the Dialogue
-
Add a BaaS Dialogue
graph LR; Dialogue[Dialogue] --> Input(Input) Input --> BaaS(Baas) -
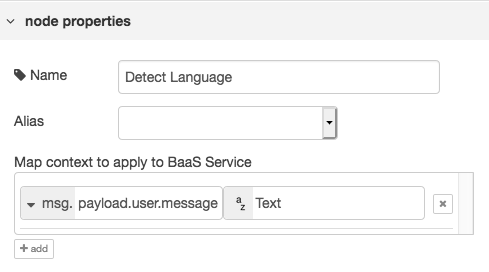
Label that node
Detect Language -
Set it’s Alias to
ComprehendDetectLanguage -
Configure the BaaS to pick up the message for the user, and assign it to the Text Property expected by the BaaS
-
This means that
msg.payload.user.messageends up pointing mapping to theTextproperty in your BaaS -
Save the language value 1. Drop a function node onto the canvas and connect the Language Detect BaaS node to it 2. Name it
Save Language3. Add in code to map the results of the Baas to msg data. `msg.languageCode = msg.baas.ComprehendDetectLanguage.response.Languages[0].LanguageCode return msg;`` -
Add in Sentiment Detection.
-
Repeat the steps above to add in another BaaS then point it to
ComprehendDetectSentiment -
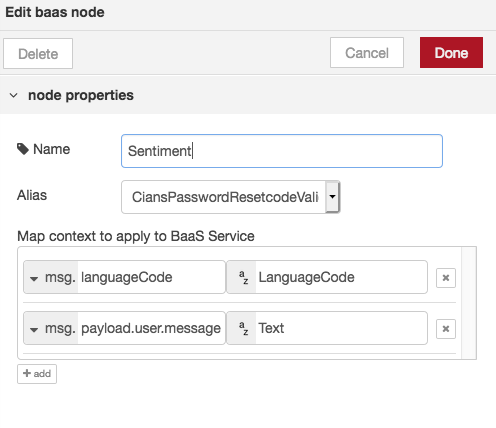
Configure this node to be named
Detect Sentiment -
AWS Comprehend Detect Sentiment can have a language specified along with the text to be processed. 1. To use the previously detected sentiment, we map
msg.languageCodetoLanguageCode2. Mapmsg.payload.user.messagetoTextto sent the user message to comprehend -
Your node should now look like
-
Change the response based on the sentiment. 1. Now add a switch node to the end of your chain. 2. We want the switch node to evaluate a response from the BaaS. In this case:
baas.ComprehendDetectSentiment.response.Sentiment3. We will get back either POSITIVE, NEGATIVE, or NEUTRAL responses.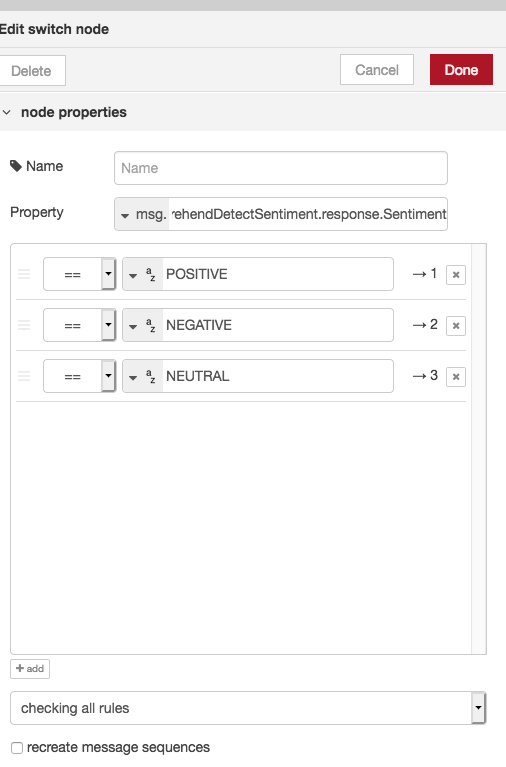 4. Configure the node to check all rules, then hit done.
 -
Provide a Response and Translate it using AWS Translate
-
Drop in three BaaS nodes, one for each Sentiment
graph LR; Switch[Switch] --> Positive(Positive) Switch[Switch] --> Negative(Negative) Switch[Switch] --> Neutral(Neutral) -
Configure each BaaS node: - All of them will have the Alias set to the
TranslateBaas - A string propertyenmapped toSourceLanguageCode- A property msg propertymsg.languageCodemapped toTargetLanguageCode- A string property value for what you want the message to say based on the sentiment.- E.g.
I am glad you are feeling so greatfor POSITIVE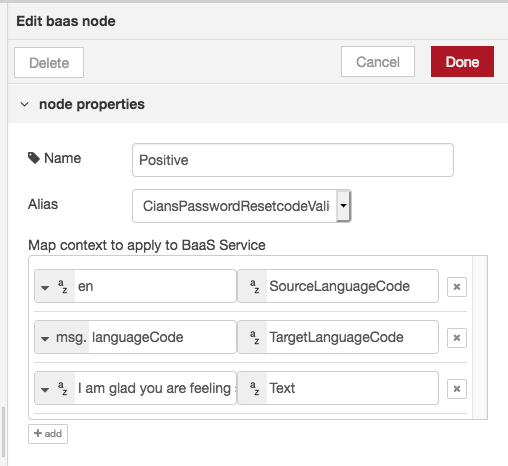
- E.g.
-
Translate the response to user 1. Drop in a
Dialogue Node2. Name itResponse3. In the message field, change the type tomsgand map the response from the translation BaaS.baas.Translate.response.TranslatedText4. Connect the output node of your bot to the first dialogue node.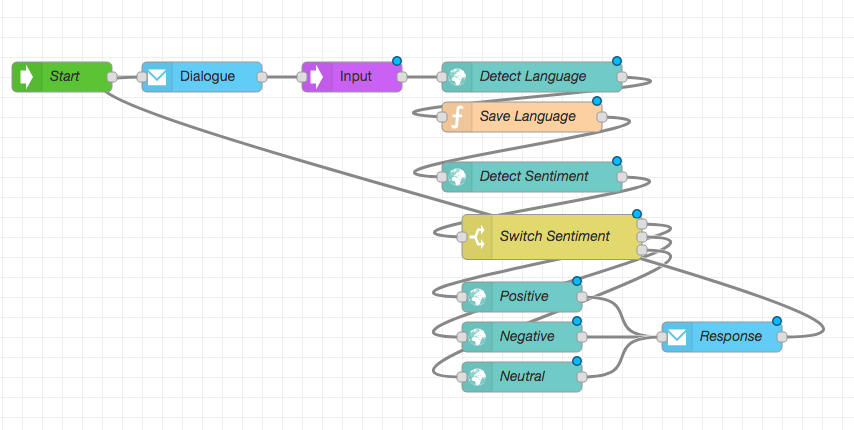
Play and Test
- On the Bot Designer Canvas, click
Deployto save your changes - Hit the back button to go to the bot detail page.
- At the bottom of the bot detail page, there is a
Testbutton - Once you are on the test page, you can interact with your bot.