Using the Intent Detection Node
Using the Intent Detection Node, it is possible to upgrade a classic flow bot to match intents. Classic flow does not support a very conversational interface out of the box. In this model, the NLP service can do just intent matching on user input while flow manages the actual conversation.
We currently support the following NLP service for intent detection from within a flow:
- Google DialogFlow
- Microsoft Luis
- AWS Lex
Dialogflow NLP Detection from within Flow
In this tutorial we will use a flow-based bot with DialogFlow to create a bot that can detect intents and slots.
Set up Your Secrets
Since your bot will use DialogFlow services, you will need access to a project with intents you would like to detect.
You can then create a secret for the intent detection node to use.
Build your Initial BOT
For this example we will use a classic flow bot.
- Select the
Bot Designermenu item - Click
Create Bot - From the blueprint options, choose
Classic Flow Bot - Name your bot, then set the custom message to
Hi, How are you doing? - Build it!
Connect Everything Together
- Prep your Flow
- Open back up your bot. (Bot Designer -> Bot name).
- On the bot detail page click
Designer. - Delete all the nodes.
- Build the flow as shown
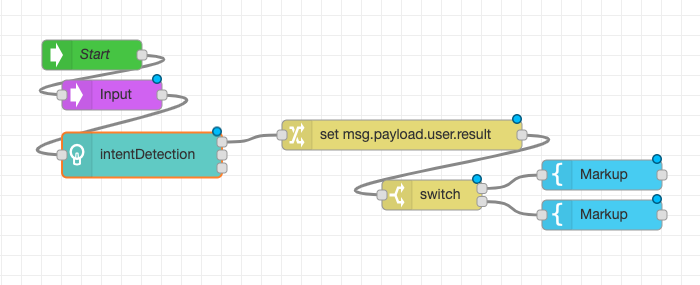
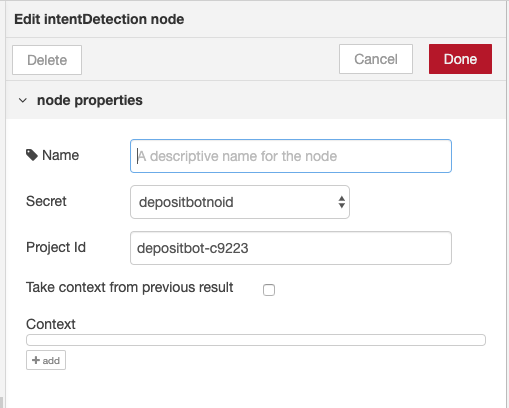
- Configure the intent detection node
- Open the node and select the secret created in a previous step.
- Enter the project ID of the DialogFlow project.
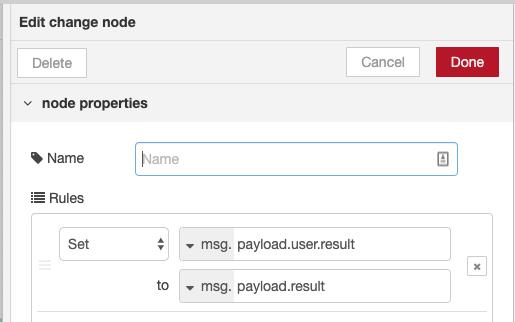
- Configure the change node
- Follow the image below, this puts the result of intent detection into the msg.payload.user object to allow it to be used in a markup node later.
- Configure the switch node
- The switch node will allow you to visit different output ports based on the configuration of the switch. This can be used to perform a different action based on the intent detected.
- Example of a configured switch node, your implementation will vary. The property will remain
payload.result.intentbut each case will differ based on your intent names.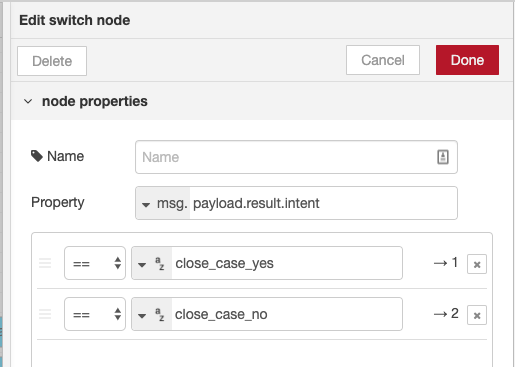
- Setup your markup nodes.
Play and Test
- On the Bot Designer Canvas, click
Deployto save your changes. - Hit the back button to go to the bot detail page.
- At the bottom of the bot detail page, click on the
Testbutton. - Once you are on the test page, you can interact with your bot.
Microsoft Luis NLP Detection From Within Flow
Create a Classic Flow Bot
- Follow the getting started instructions to generate a classic flow bot.
- Delete the prompt node that comes after the first message and replace it by an input node followed by an intent detection node
Create your Luis App
- Go to https://www.luis.ai/home
- Log in, then create a new app
- Name your bot
- Set the culture to English
- Set a memorable description for your bot.
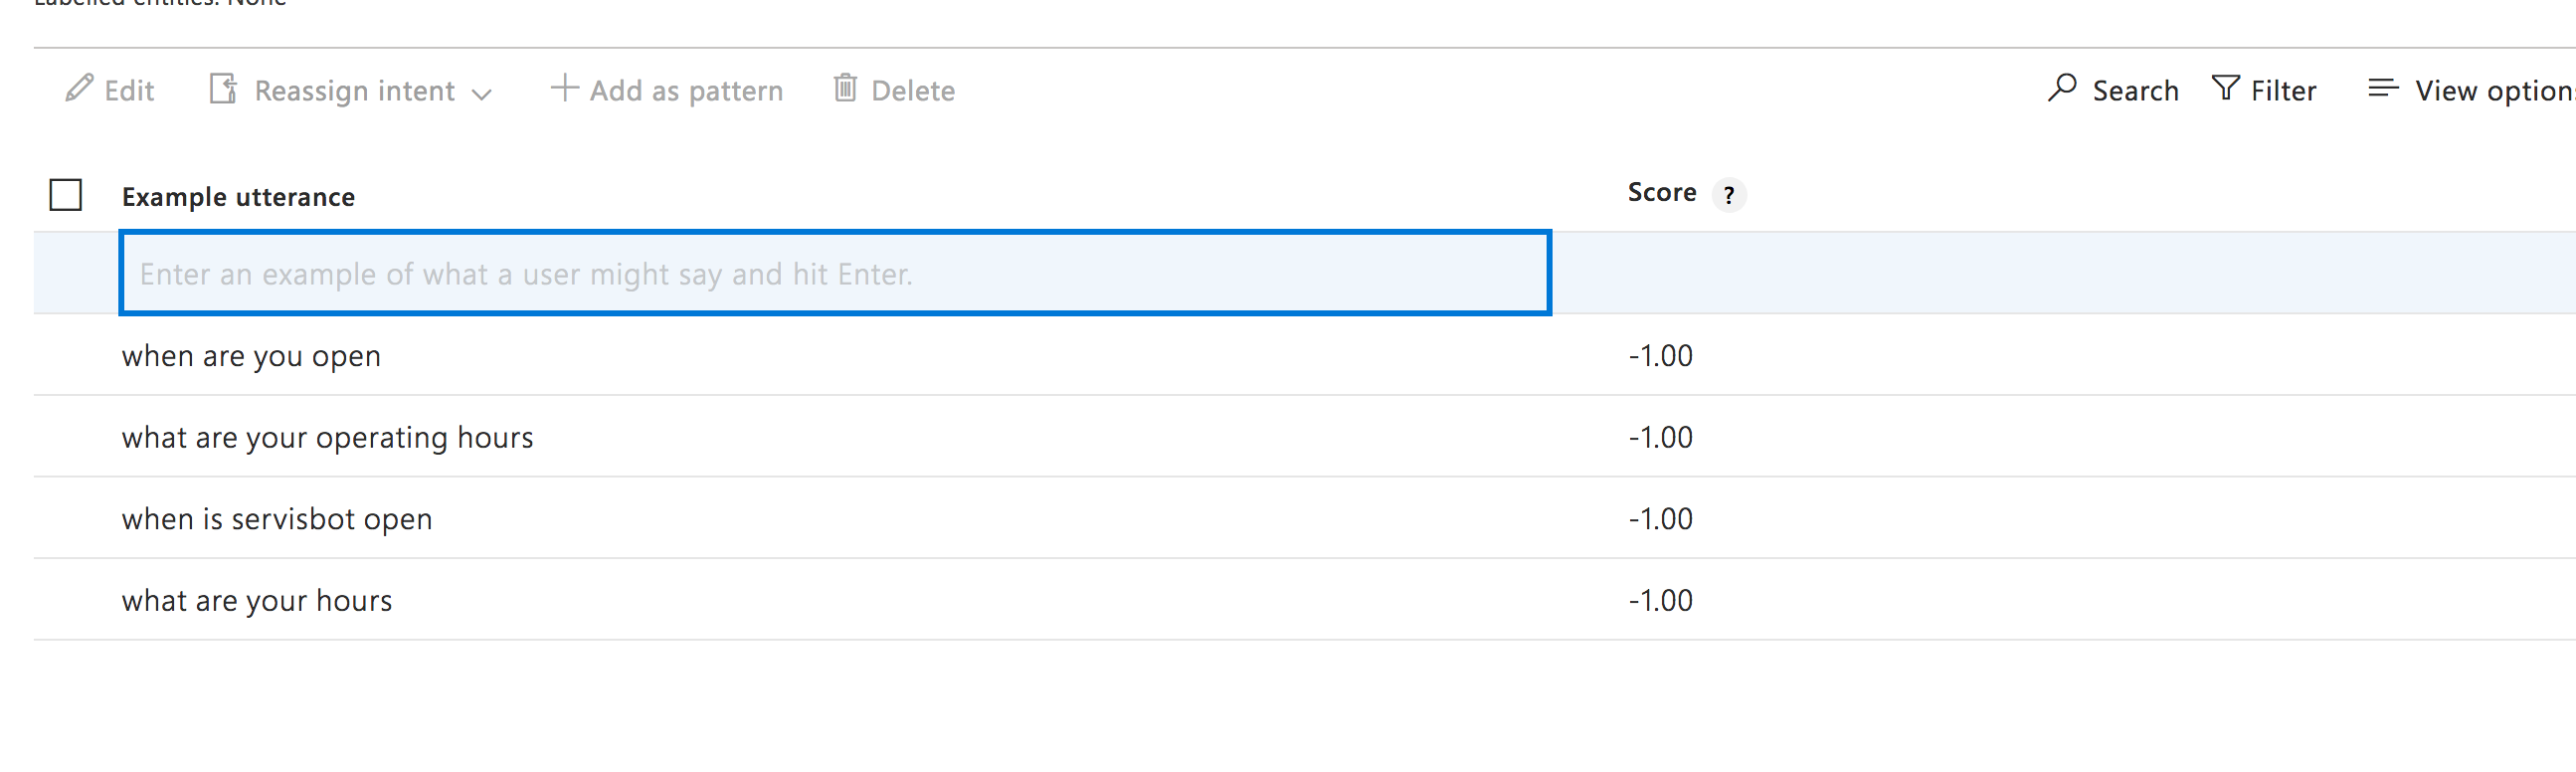
Set up Utterances
- Click on the build tab
- Create an utterance called
hours - Add a few utterances
What are your hours
When is servisbot open
What are your operating hours
-
Create a new intent for
who works at servisbot -
Add some utterances
Who works at servisbot
who are your employees
name some of your developers
- Click on the
trainbutton for your bots, then click thePublish button, make sure you select theproductionoption when publishing.
Create Your Secret
Follow the standard Luis instructions for secret creation to get your App ID and secret, instructions for doing this can be found here. Creating Luis Secrets
Set Up Your Node
-
Go to your Bot’s Designer page and edit the Intent Detection Node
-
Make sure “Luis” Is selected as your NLP provider
-
Select the secret you created earlier
-
Enter your
Application Idinto theApp Idfield -
Enter your Luis
Regioninto theRegionfield, for information on where your region can be found in Luis, see Creating Luis Secrets, this section will tell you to take note of your Luis App location, this is the region.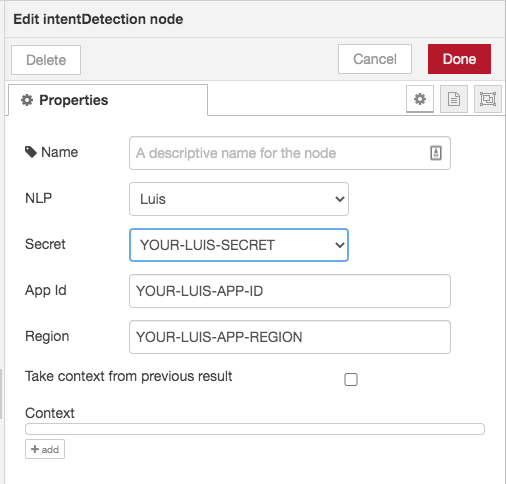
-
Click done and save your node
-
The response from Luis takes the following format
    msg :{
      payload :{
        result: {
          intent: 'intent_name',
        }
      }
    }
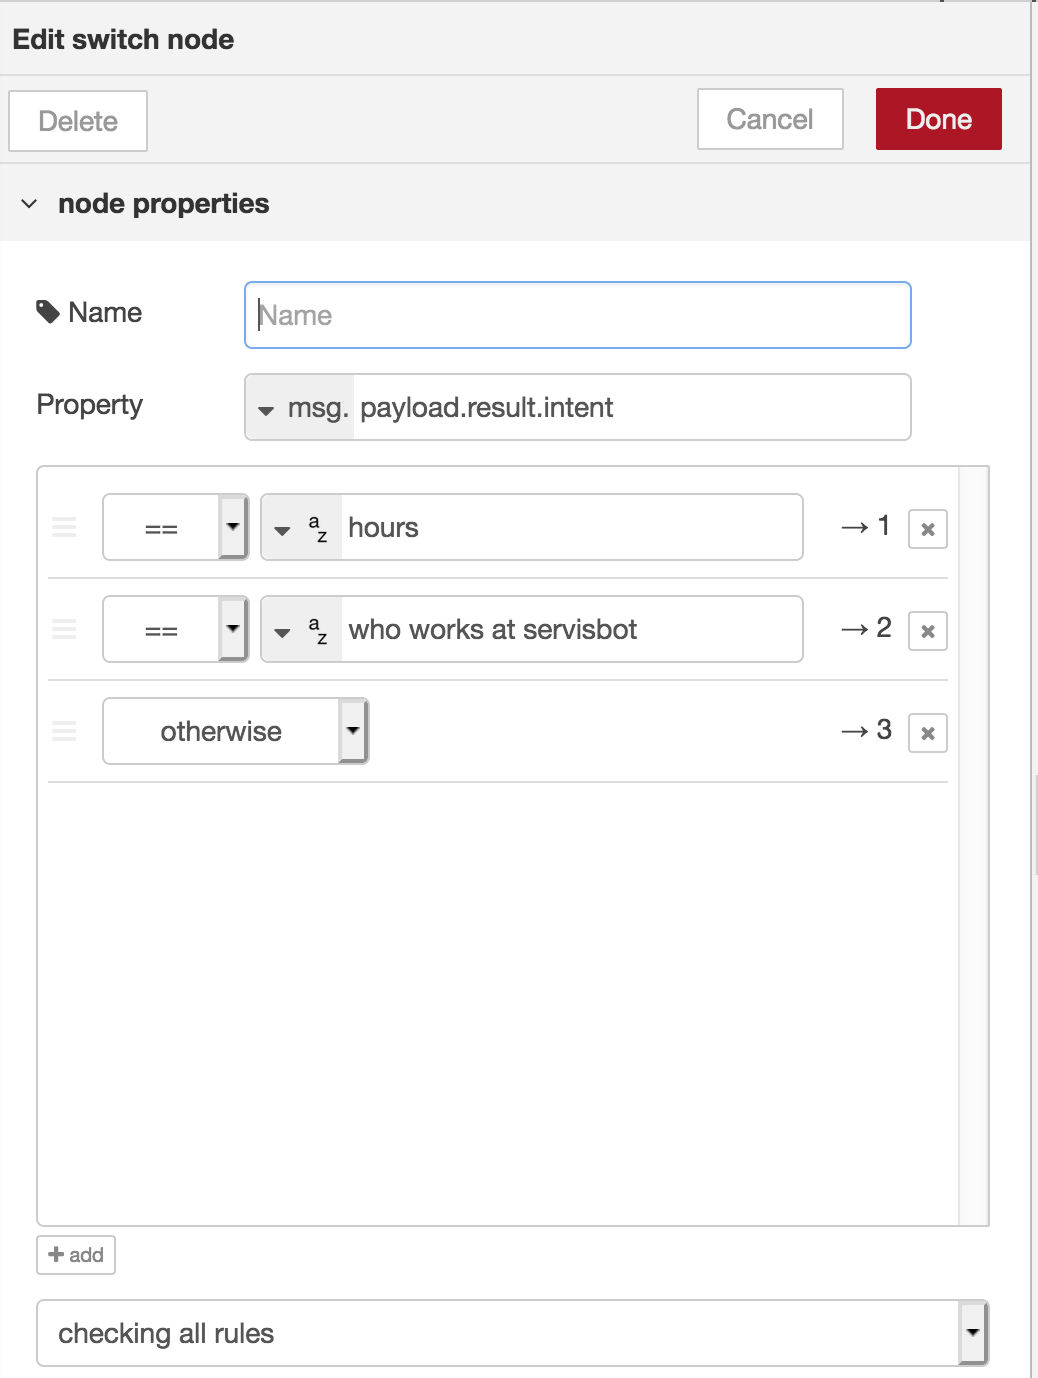
Wire the experience together
- Add a switch node after our
intent detection nodeand wire them together. - Add a few cases to the switch node. One for each intent you have configured, and one for “otherwise” to catch non-matches
- The switch node should match on msg.
payload.result.intent
- The switch node should match on msg.
Play and Test
- On the Bot Designer Canvas, click
Deployto save your changes - Hit the back button to go to the bot detail page.
- At the bottom of the bot detail page, click on the
Testbutton - Once you are on the test page, you can interact with your bot.